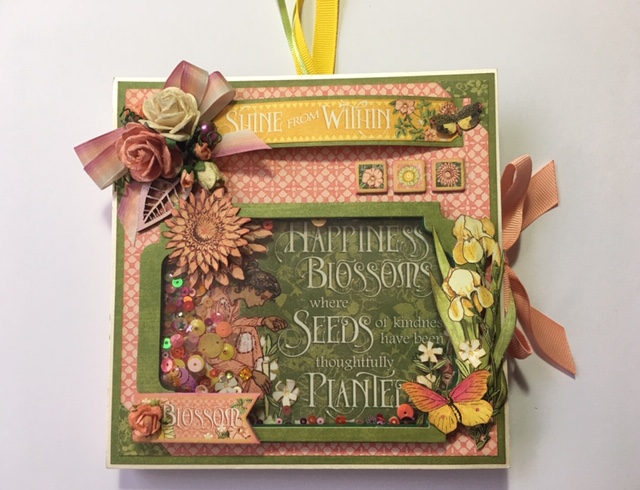
Tina's challenge projects comes in a few parts...... once you've completed it, you will have a beautiful shaker easel card with its own mini album and tag addition. Such a fun project - and like Tina says, perfect for Mothers Day!
Hi every one. This month for NSD, I have decided to incorporate Mothers Day for my project. My wonderful and caring mother passed away over 14 years ago, just before my youngest daughter was born, so I don't get any opportunities to make Mothers Day cards, gifts or keepsakes. As well as sewing, gardening was one of my mum's favorite things to do and she always had a beautiful garden. That's why I chose this paper collection. I wanted to create a keepsake that can be given for Mothers Day that has room for photos to be added every year.
This year I will be giving away my project. To be in with a chance to win join in my challenge.
My CHALLENGE for this month is to make this card. I would like to see photos of your project in early stages, ( e.g your cut pieces ready to be put together) and the finished project. Upload the photos in my album ( Photos must be uploaded in my album to be in with a chance) on the Crafty Vera And Friends Facebook page. Anyone can enter, even Team Members.
My first project is a Double Layered Easel Shaker Card/Album.
Cut one piece at 6'' x 12'' and one piece at 6'' x 6''.
Score the longer piece at 3'' and 6''.
Fold the score lines as shown in the image below.
I cut my patterned pieces slightly smaller for each layer and glued these to the base.
Next, I made the shaker piece by cutting several layers of the frame in white cardstock. I made the frame with the two larger Label Dies taped together. I cut one in the green paper and then just using the larger die I cut out the base picture and two pieces of acetate.
I layered the frames on top of each other until I was happy with the thickness and coloured them with green paint.
I glued the frame onto the base and used my Zig Wink of Stella Brush Pen to add shine on the words and added some shaker mix and one of the acetate sheets.
I then added the next frame with some fussy cut flowers from the collection. Again, I put in shaker mix the other acetate piece and the top frame.
Next, I coloured some flowers from my stash with the Glimmer Mist and a wooden leaf also from my stash, with the Inka Gold paste.
I put all my elements together with some fussy cut flowers and butterflies, and some ribbon along with some of the chipboard pieces from the collection.
I then glued the shaker piece onto the 6'' x 6'' base and glued the bottom half of the 6'' x 6'' piece to the scored top 3'' x 3'' main piece as shown below.
Inside I have left a place for photos on the bottom and top parts of the card. I then added the bottom sentiment, which I glued onto a strip of chipboard to hold the card in place when open.
I have left the card for personal touches to be added, so it can be gifted for Mothers Day or any other occasion.
Next time, I will show you how I added the second part of the card which is the album.
I hope you have enjoyed this project and please join in my CHALLENGE for a chance to win this card. Good luck!
Go Team Tina.
Here is a list of the products I have chosen from AVSC:
Graphic 45 - Garden Goddess 12 x 12 Collection Pack
Graphic 45 - Garden Goddess - Chipboard Pieces
Graphic 45 - Garden Goddess - Tags and Pockets Pack
Tim Holtz - Thinlits Die - Stacked Label
KaiserCraft - 6 x 6 Designer Template - Botanical
Inka Gold - Rose Quartz - Metallic Paste
Tattered Angel - Glimmer Mist - Wedding Pink
All of these products can be purchased HERE at a discounted price.
Thank You and Happy Crafting.
Tina xxx


Love this Tina.. The complete thing is gorgeous xx
ReplyDeleteThank you Donna xxx
DeleteCan’t wait for the rest of the parts!! 💕💕
ReplyDeleteThank you Amira. xxx
Delete