This is just a quick post to share an idea I had for the cut
aparts from the Crate Paper Magical Forest papers that we had to play with
during August for the Creative Team.
Years (and years) ago when my children were young in school,
occasionally I would slip a small note in with their lunch, just as a quick “hello”
or “have a great day.”It was just a
little something special to remind them that mum was thinking of them.
Some of the cut aparts are perfect for this, just write a quick note on the back and they
are done.
Have them cut up already so it’s quick and easy.Imagine their surprise at finding a special
little note just for them.
I hope you try this quick little
idea and your children enjoy the special surprise from mum or dad.
Hey everyone for my project this week I decided to make an envelope album using some Kraft C6 envelopes from my stash.
To start with I cut 2 pieces of chipboard 1/4 inch larger than the envelopes and covered them with the papers from the Crate Paper Magical Forest 6x8 paper pad.
I took another patterened paper from the same pad and cut it to the same height as the covers and at 2 1/2 inches across. I scored it on the 2 1/2 inch side at 1 inch and 1 1/2 inches.
The half inch in the middle forms the spine so stick the 2 inch flaps on the front and back cover of the book as shown.
Now it's time to stick the envelopes together. Put double sided tape on the flap of one envelope and stick the back of another envelope onto it making sure you line them up and the other flap is facing the same way when you turn it over.
Repeat this process until you have stuck all your envelopes together. I used 7 envelopes but I think it might work better with 10.
Next put double sided tape on the back of the first envelope and stick it on the inside of the cover page. The pages should be facing the right.
Stick the last envelope to the back by putting double sided tape on the flap and your album is ready to decorate.
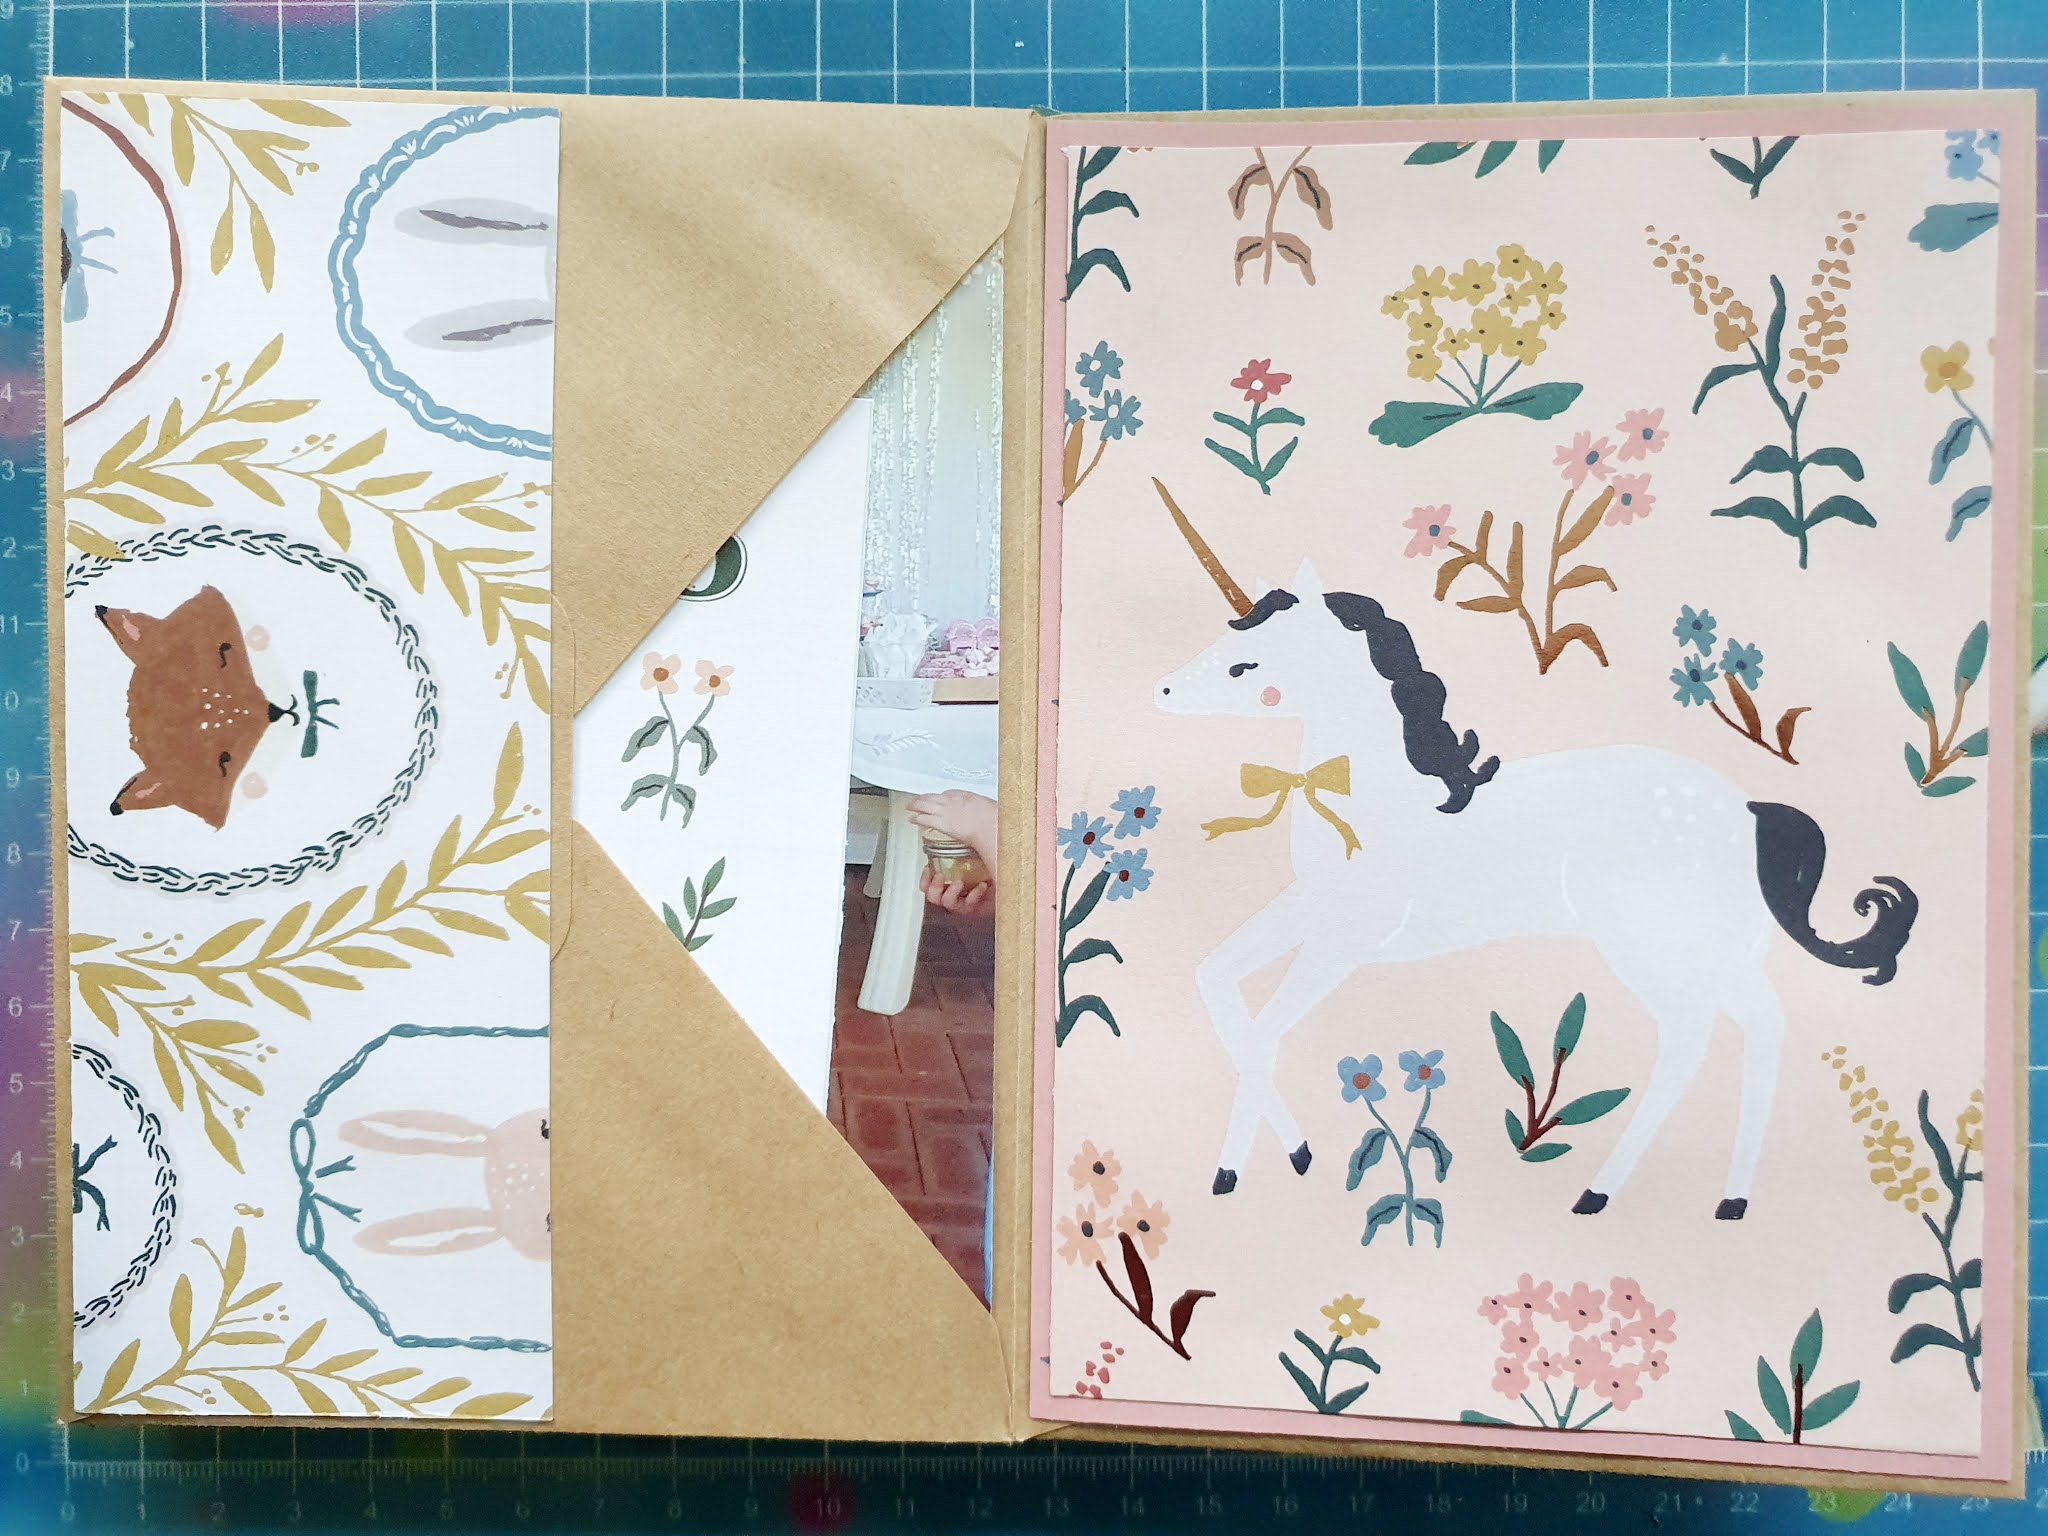
Here are some of the pages that I have decorated; for this one I used one of the scraps for the pocket on the left and made a little belly bad so you tuck some notes in and inside the envelope is a photo of my daughter at school and a 3x4 card from the Crate Paper Magical Forest Willow paper. On the right, I have used the Crate Paper Magical Forest Sunlight paper cut at 1/8 smaller than the envelope and a page from the 6x8 paper pad on top of it.
All the pages on the left have a photograph and a 3x4 card in them. You could also choose to stick photographs on the left. The base on the left here is the other side of the Crate Paper Magical Forest Wildflower paper and I have used one of the 3x4 cards to make a pocket. The sticker used are from the 6x12 sticker sheet.
I really love how easy this was to put together and it makes a great way to store photos. You could easily add more than one in each envelope if you like.
Thanks for following along with me and see you again in a week.
I don't think I got all of the 'home decor' or should I say...'craft room decor' out of my system from a couple of months ago, which is how this easy project came about. I had this very plain crate and thought it would look wonderful, decorated up and used as a holder for some inspiration tags. I wanted it sitting on my craft table, filled with tags that I could look at and find inspiration. I really adore how this turned out and it does look fabulous sitting on my desk with some beautiful tags in it that I had recently purchased from our own lovely Art Craft and Journals Creative Team Member.
I am going to be using the 'Wishes' 12x12 sheet of paper from Magical Forest Collection. This is like a dusty pink background with some bluey/grey stars on it. It is such a pretty colour and I think it will look great on my crate. I cut some strips for the sides of the crate and these measured at 1.8cm x 17.5cm. I also wanted the paper covering the ends of the crate so I laid the crate on some photocopy paper and drew the shape of the side of the crate. I did trim this shape down slightly so I knew it would be a perfect fit on the ends.
I gave the crate a good covering of gesso, inside and out. This also acts as a sealer as well as a good base to add my coloured paint on. You really don't need to paint the whole crate because most of it will be covered with paper but I prefer to paint all of it.
When the gesso had dried, I painted the crate with the Dina Wakley Acrylic paint 'Marine'. I found that this colour matched perfectly with the colour of the stars on the 'Wishes' paper.
When the Marine Acrylic Paint was dry, I gave the whole crate a slight sand with sandpaper. I wanted to distress the look slightly so it looked aged. It worked great and I just love that look.
Then it was just a matter of gluing the precut strips of the 'Willow' pattern paper to the side strips and at the ends. So simple! I did ink the paper edges with a vintage ink to make them pop a little.
I wanted to add a small decoration hanging from the handle. At first I thought a small tag but decided to jazz it up and make it a heart shaped hanger.
I drew a heart shape on some scrap cardboard and covered each side with the same 'Willow' paper from Magical Forest. I then cut out one of the sayings from the 'Always' 12x12 sheet and glued it on to one side of the heart...'HAPPINESS LIVES INSIDE THE SMALLEST MOMENTS'....a beautiful saying!
I tied my heart on the crate handle with some string.
I love the distressed look of my Tag Crate ! Now to fill it with inspirational tags!
You can pick up some some very useful and undecorated items from our Kmart here in Australia, so why not pop in and have a look. Then, you can pop over to Aunty Vera Scrap and Craft and grab some of the gorgeous papers she has in stock especially this Magical Forest Collection by Crate Paper, which is on discount for August.
Hello and welcome back to another Creative Team project
using the Crate Paper Magical Forest papers.These papers just screamed out for me to do some smaller cute projects
this month.
I decided I needed to make some Artist Trading Coins (I
think it was the critters paper that inspired me).They are great to use as embellishments or
make and swap them with fellow crafty friends.