

Tim Holtz Tag / Card holder
Have you all seen those glorious 'huge' Tim Holtz ETCETERA Tags...oh my! they are wonderful. I am going to be playing/experimenting on the medium size tag which measures 12 inches by 6 1/2 inches...and I plan to have fun!!!
I wanted to make a tag card holder. Something that would look pretty and be useful as well. A place to store my handmade cards, something inspirational !

To start, I made the box which is going to fit on the bottom of the thickboard tag. I used a piece of teal coloured cardboard 10 1/2 inches long by 5 1/2 inches high. I scored on the long side at 1/2 inch, 2inch, 8 1/2 inch and 10inch marks.
Then on the short side scored at 1/2 inch and 2 inch mark.
I folded the score lines and then cut on the score lines as shown below... (If you watch my process video, you will get clearer instructions or copy the diagram below).
You then glue the two small flaps and fold them in to make a half shaped box, leaving the thin flaps to be folded and glued over the thickboard tag, which is done once you decorate the base of the tag.

Then, I started to decorate the tag itself. I used the Maggie Holmes Handwritten patterned paper to cover the tag. I placed the tag on the paper, drew round it for correct shape and then cut it out. I also drew the circle at the top and hand cut it out. I used my distressing tool to rough up the edges of the paper. Before gluing the paper down I gave the edges of the tag a coat of white gesso and then glued the paper to the thickboard tag.
Below: Distressing tool for edging


Below: painted edges with gesso.

Below: Tag base is on ready for box to be put on it.

I decided to decorate the half box before actually gluing it to the tag. I cut parts from the Maggie Holmes Keepsake patterned paper and decorated the sides and front of my box. I also inked the edges with a vintage ink (my supplies) to tone down the teal colour slightly.


I cut the butterfly out as well and used that as my focal image on the front of the box, adding some of the flowers at the sides. I also added some cheesecloth under the butterfly and a row of green leaf ribbon (my supplies), which I ran from the bottom all the way to the top. I then added a saying from the Tim Holtz Small Talk stickers....'throw kindness around like confetti'...this finished off the box part.

I ran a decorative edge on the right hand side of the tag and curved it round at the top of the tag. i added a few bits'n'pieces I had in my supplies as a final touch.

I used a piece of tuille and ribbon and pushed it through the hole.

Front view

...and holding some cards...


I absolutely LOVE the finished project and will definitely come in handy holding my handmade card for this year.
You can view the full process by clicking the video below:
I really hope you enjoyed my project as much as I did making it. A little experiment here and there but in the end it turned out fabulous!!
Wendy xox
I wanted to make a tag card holder. Something that would look pretty and be useful as well. A place to store my handmade cards, something inspirational !
What I Used:
*Tim Holtz Etcetera Medium sized tag
*Maggie Holmes Handwritten patterned paper
*Kaisercraft DIY Flora Daisy Die
*Glue
*Edge Distressing tool (my supplies)
*a piece of cardboard 10 1/2 inches by 5 1/2 inches (my supplies to make a small box)
*white gesso for edges of tag
*extra bit'n'pieces you have laying around for decorations

To start, I made the box which is going to fit on the bottom of the thickboard tag. I used a piece of teal coloured cardboard 10 1/2 inches long by 5 1/2 inches high. I scored on the long side at 1/2 inch, 2inch, 8 1/2 inch and 10inch marks.
Then on the short side scored at 1/2 inch and 2 inch mark.
I folded the score lines and then cut on the score lines as shown below... (If you watch my process video, you will get clearer instructions or copy the diagram below).
You then glue the two small flaps and fold them in to make a half shaped box, leaving the thin flaps to be folded and glued over the thickboard tag, which is done once you decorate the base of the tag.

Below: Distressing tool for edging

Below:Hand cut hole at top of tag

Below: painted edges with gesso.


I decided to decorate the half box before actually gluing it to the tag. I cut parts from the Maggie Holmes Keepsake patterned paper and decorated the sides and front of my box. I also inked the edges with a vintage ink (my supplies) to tone down the teal colour slightly.

Once I had my background papers on the box I glued the box to the bottom of the tag, by putting a strip of double-sided tape on the small flaps and then some glue. It was a nice snug fit and this is what the back looked like once stuck on.

and the front when the box had been added.

Then it was time to decorate the box and the front of the tag. And, I let loose!!!...lol...I made heaps of flowers up from the Kaisercraft DIY Flora Daisy Die and in the center of each flower I added some Nuvo Crystal Drops (white)

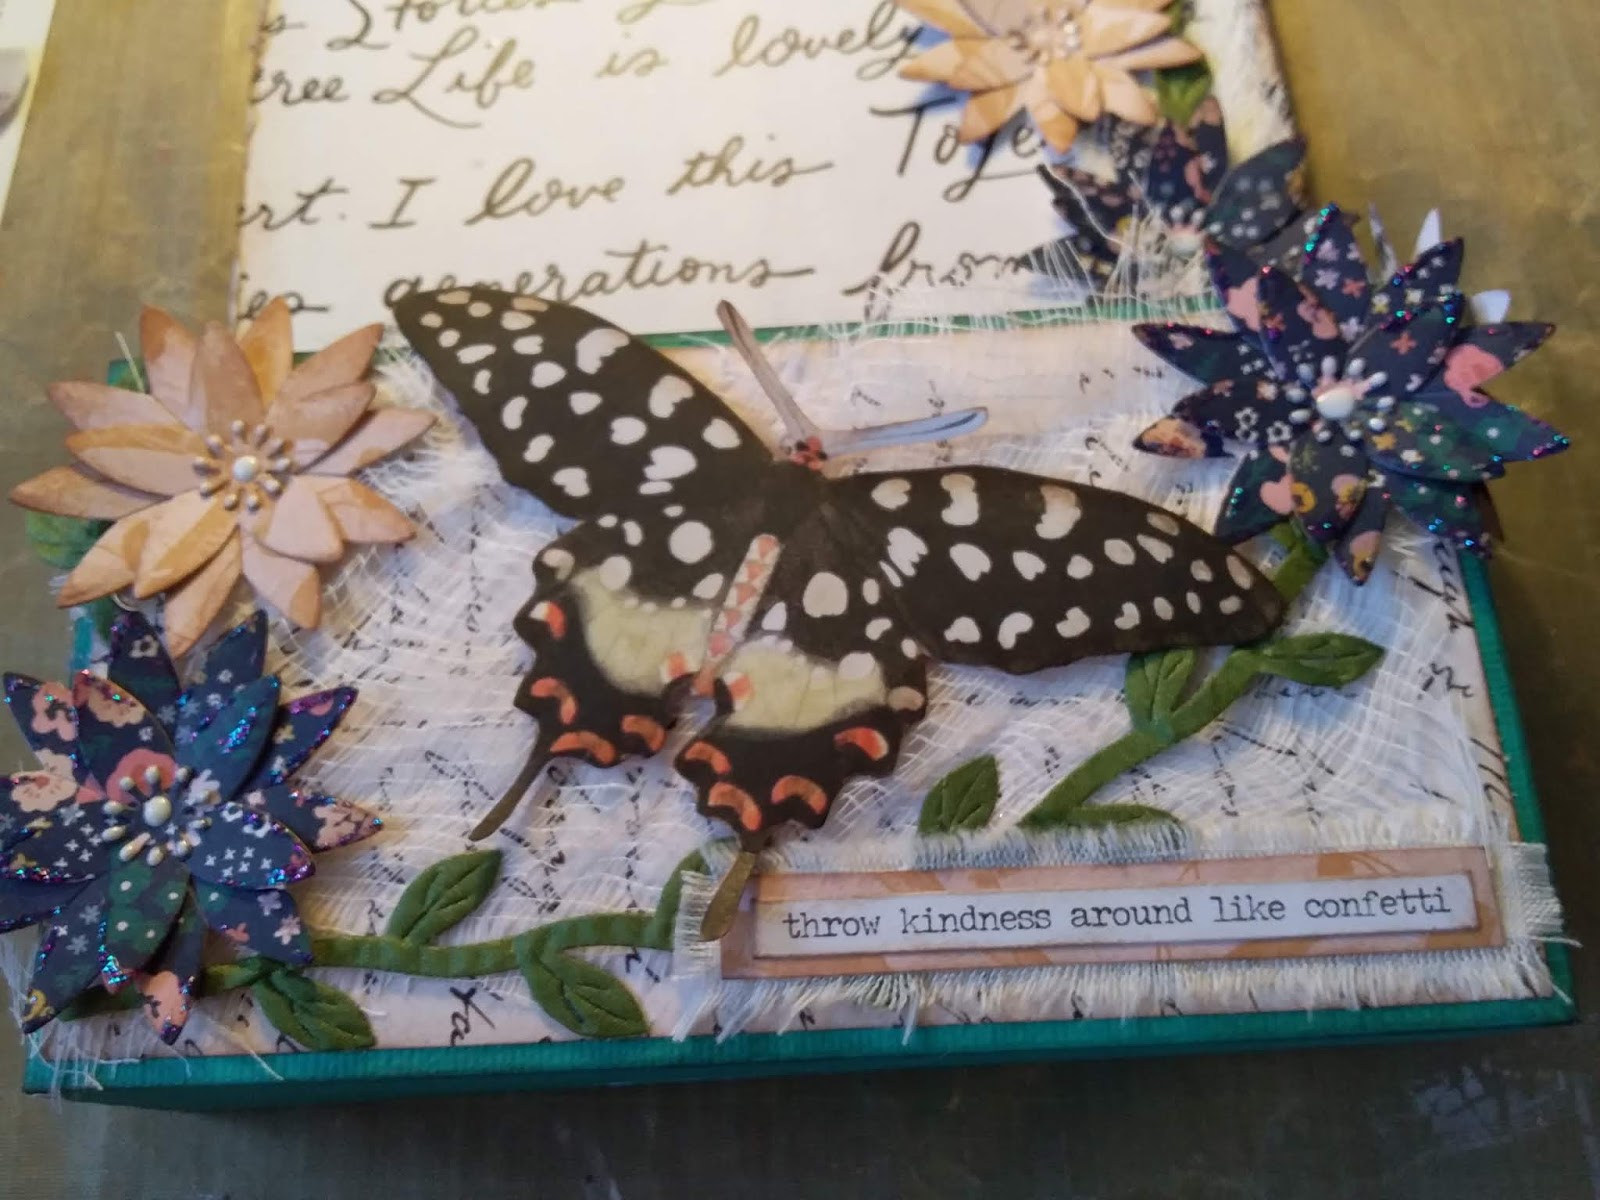
I ran a decorative edge on the right hand side of the tag and curved it round at the top of the tag. i added a few bits'n'pieces I had in my supplies as a final touch.

I used a piece of tuille and ribbon and pushed it through the hole.

Front view

...and holding some cards...


I absolutely LOVE the finished project and will definitely come in handy holding my handmade card for this year.
You can view the full process by clicking the video below:
I really hope you enjoyed my project as much as I did making it. A little experiment here and there but in the end it turned out fabulous!!
Wendy xox


