
Hello Crafty Friends!
The best thing about purchasing Easter collections designed in the Northern Hemisphere is that they tend to have a Spring theme running through them as well as the Easter theme. So when you've used up all the Easter 'bits', you pretty much have a whole other collection to play with!
Today Emily does just that - creating a gorgeous file holder and journal set from the Spring elements in our March Kit....

Emily here with my final project with the super fun Hippity Hoppity kit from Aunty Vera. I’ve made a file holder and matching journal cover. I saw the file holder die and had to have it and Vera kindly got it in for me. When I was picking it up Vera had a pile of the journal dies and, well, I just had to have it too!
The best thing about purchasing Easter collections designed in the Northern Hemisphere is that they tend to have a Spring theme running through them as well as the Easter theme. So when you've used up all the Easter 'bits', you pretty much have a whole other collection to play with!
Today Emily does just that - creating a gorgeous file holder and journal set from the Spring elements in our March Kit....
Emily here with my final project with the super fun Hippity Hoppity kit from Aunty Vera. I’ve made a file holder and matching journal cover. I saw the file holder die and had to have it and Vera kindly got it in for me. When I was picking it up Vera had a pile of the journal dies and, well, I just had to have it too!
I wasn’t sure what to use to make these but Vera had some MatBoard from Sizzix so that’s what I used.
I have to say I’m not in love with it but I might just need more practice. I hadn’t used the dies before or the mat
board so it could all be user error but the joints tended to crack and adhering
the joints was also problematic.

But here goes with how I put them together anyway. I started with the file holder, gathering all
my papers and inks. The papers in the
kit can work for Spring or Easter so I’ve gone with a Spring theme for this set. I cut the base in one go as the mat board is
big enough, I had to do the papers in separate parts as the die is over 12”
long. I cut two in the yellow from the HelloEaster Solids Set of papers and then another one in my designer paper.

Once I had all my parts die cut, I trimmed down the yellow
and the designer paper to give a small border to both. I then set about inking all my edges, yellow
round the base and the plain paper and the aqua colour on my designer paper,
using the inks from the kit.

I figured
it would be easier to layer all the pieces before I assembled the file holder but
remembered not to do the final inside one to hide the tabs under it. Not that you can really hide them when they
are so thick. I found the base particularly
cumbersome with the various tabs, it ends up really bulky, so I’m going to try making
the holder again using a thinner material.


To decorate the file holder I tried out the new Kaisercraftfoam Vera has. I’ve used other flower
making foam before, this one is much the same but maybe a bit thicker. I got really lazy and didn’t heat this one, I
just used my shaping tools and stretched it out with them, I didn’t have a single
tear, which makes me think this stuff is thicker

I cut one larger flower, using a cherry
blossom flower die from La-La Land Crafts that has three different sized dies,
out of Tulip coloured foam. The top right of the next photo shows the three flower pieces, which I shaped and inked a bit with the pink ink from the kit. I poked a hole with a pin and threaded through a pearl stamen I had in my
stash for the centre. I then just layered up the flower pieces to get the flower pictured in the bottom right.

I used
another La-La Land die, Autumn Leaves, to cut some leaves from the Leaf foam and
some smaller flowers from the Daisy foam. For the smaller flowers I used two of the same sized petals but one I stuck quite closely down on the stamen to create a centre. I think the flowers
turned out quite nicely. To finish of
the file holder I added in the label frame that comes with the die.

With the file holder done I moved on to the journal
cover. I had enough of the same designer
paper left to do the outside of the cover.
My steps were basically the same as the file holder, one from the mat
board for the base, two from plain paper and two from designer paper.

For the inside I used the same pattern but in
pink and teamed it with some aqua plain paper.
More inking of edges and then adhering the layers before putting the journal
cover together. I really should have
adhered the layers using something like Jak paper, which I was going to do, but
I couldn’t find my Jak paper. Take it from
me, find yours before you do this or else buy some before sitting down to start
your journal!
One of my pieces of green check paper wasn't quite wide enough but this got hidden in the spine. I used the red line tape Eileen Hull recommended, as you can see in the photo. It's then an easy thing to line up the holes to adhere the two spines together.

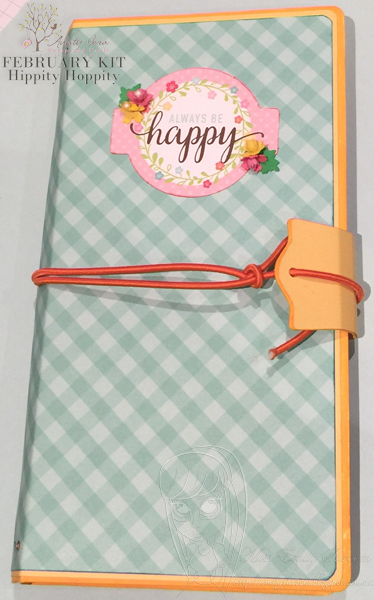
To decorate the journal cover I picked a piece of ephemera
from the set in the kit that had a great sentiment. I made some more small flowers and leaves and
finished off with some bright orange cord to close the cover, using the
included tab closure from the die. I haven’t
strung the actual cover yet as my cord is way too thick, rooky error that one,
buying cord without first checking the size of the hole you need to thread it
through! When I finished I tried to put
the journal inside the file holder but it doesn’t quite fit, not sure if it’s
because of the thickness of the mat board.
Despite the issues I had with them I really do like these
two dies and the set I’ve made. I had a
blast playing with this month’s kit and hope you will too!

Thanks for checking out my project, please come visit me
over at my blog.

Fab projects Emily 💕💕
ReplyDelete