
Hello Crafty Friends and Happy Weekend!
Our Guest Designer Emily joins us today with the perfect weekend project...... dig out all your Halloween idea-ology...... grab the power tools (YES!) - and spend some fun crafty time creating fabulous and spooky home decor pieces.....

Hi everyone, Emily here to share a home décor project I made to celebrate my favourite season, Halloween. It’s based around two of Tim Holtz’s Coffin Vignette Boxes, which are now retired, but you could start with any coffin base (paper mâché ones available online) or even make one. I’ve turned them into a pair of carts to serve up a haul of Halloween candy.
Our Guest Designer Emily joins us today with the perfect weekend project...... dig out all your Halloween idea-ology...... grab the power tools (YES!) - and spend some fun crafty time creating fabulous and spooky home decor pieces.....
Hi everyone, Emily here to share a home décor project I made to celebrate my favourite season, Halloween. It’s based around two of Tim Holtz’s Coffin Vignette Boxes, which are now retired, but you could start with any coffin base (paper mâché ones available online) or even make one. I’ve turned them into a pair of carts to serve up a haul of Halloween candy.

I did have a helper in creating this, my new bear, Frederick, who dispensed
sage advice from his vantage point atop a pile of Thinlits dies.

He was the one who pointed out my initial
holes for the wheels were too small, too bad he didn’t say anything about the
size of the drill bit before I started! Yep, this is a project that requires some real tools, starting with a
proper drill to create the holes for the Tim Holtz Mini Pulley Wheels. These aren’t on the shop site but if you ask
Vera really nicely like I did she will order them in for you. I started with a small hole, too small as the
screws on the pulley wheels are pretty short, so created a countersink hole
with a bigger drill bit. Once you’ve got all the wheels on it’s time to get decorating.


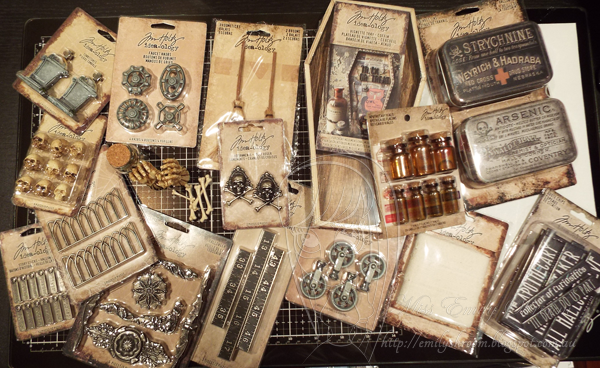
Here’s all the goodies I had, some of them
are older Tim Holtz Idea-ology and some are from this year’s Halloween
release.
What I ended deciding on was a
grave digger and bone collector theme so I started with Metal Gates to go
around the coffins like a fence around a grave.
I glued these on with some E6000 glue.
Then I added in a pile of the Skulls and some old Boneyard bits and pieces
and Wishbones on the second of the carts.
I also covered the screws on both carts with bits from the Halloween Vignette
Accents.

For the driver’s cart I used some Tombstones. I figured
my grave digger would need something to measure the holes with so I added in
some Measurements. And I felt he would be a considerate grave digger so I gave him some Broomsticks to clean up his mess.
These were all glued down with either E6000 (good) or hot glue (not so
good, I really have a love hate relationship with this stuff, love that it
dries so quick but hate that it doesn’t actually hold so well on most things).
I then realised that clearly a grave digger would need a digging
implement. Kinda forgot to even look for
anything when I went shopping for his clothes then thought, hey, I’m a crafter,
I’ll make one. A quick internet search
and I had a picture of a shovel that I traced onto a piece of shrink
plastic. I started out colouring it with
Copics but after I shrunk it, there wasn’t really enough colour so I went in
with Brushed Pewter Distress Paint and some Rust and Ginger Alcohol Inks for
some rust. I also wanted it to have dirt
on it still so I threw on some Vintage Photo Distress Embossing Powder (sadly
they have discontinued Distress Embossing Powder) before I shrunk it. I had no idea if that was going to work but
it worked so well it is now my go to for dirt on shrinkies. For the handle I just rubbed a Walnut Stain
Distress Ink stamp pad directly onto a wooden skewer and glued it to the spade
head into the channel I created by pushing the shrinkie while it was still hot around
the skewer.


Now my carts needed a coupling, a driver and something to pull
them. This is where Frederick really
came to the fore. He says everyone
should have an apothecary jar full of skeletons as you never know when you’ll
need a skellie or two for a project. You can get skellies online or maybe you live in an area where Halloween is big and they might have some at the discount stores.

I cut an arm off a skellie and used my heat tool to bend the fingers
around a Ring Fastener. And drilled a
hole in the other end of the arm bone to thread threw the ring of a second Ring
Fastener. I then drilled holes into the
ends of the coffins to push the split pin of the Ring Fastener through. I cut the legs off the same poor skellie when
I realised I had no other way to connect my runners to the cart.


To create my runners, I carefully heated and bent the arms and legs of
two skellies into the positions of someone running. Then with the help of the new Mummy Cloth I turned
them into a pair of mummies.


I figured my bone collector would be plying his trade in the dark and the mummies would need some way of seeing where they were going so I created torches out of Boneyard bones and dripped sealing wax. The wicks are bits of string.

For my driver, I again used the heat tool to bend him into shape. I bought his hat from my local discount
store, there were three in bright colours in the pack for $2. A bit of Walnut Stain Distress Paint and it
went from yellow to brown.

Now I could
have made trousers like I used to as a kid but I haven’t sewn in years so had
no scraps of fabric. A $2 doll from
Kmart gave me a pair of very oversized pants so I cut off the legs and tied them
round my driver’s waist with a bit of string.
Figured he was working outside in the heat so wouldn’t wear a shirt
anyway (I’ve saved the shirt from the doll for another skellie driver I’m
planning on making). I also bought a
Barbie for another project and chopped a bit of her hair off to give the
skellie a bit of a shaggy mop of hair under his hat, all glued down with more
of the E6000.

I made the driver’s seat out of a Tombstone sitting on top of some
Skulls and a retired Custom Knob I filled with Nuvo Drops. I love that it cracked up to make it look like
an old weathered seat. It also sits on
its screw so that you can spin it to make it go up and down – so cool!

I wanted to give my driver a name plate so used a Halloween Word Band
with Bone Collector on it. I stuck this
to the front of the driver’s cart with E6000.
Now you can’t see it with the driver sitting on his seat but details are
there to be discovered and he’s only tied to his seat with a bit of tie wire so
this is one detail that can be found.

I framed the Word Band with some Zombie Hands, which I also used to attach the mummies to the cart with skellie feet on their bums. I joined them together with a harness that features an original Word Band “Salvaged” as that’s what my bone collector is doing. For the reins and harness I used a bit of leather thong. Oh, and there’s a plaque from the Foundry set on the back of the second cart featuring a number – sort of like a rego plate, just because I felt like there needed to be something to look at from the back.

Hope you’ve enjoyed travelling along with me and my bone collector and
will join me over at my blog. And if I’ve
inspired you to do some Halloween crafting come share your creations at the CraftyVera and Friends’ Facebook Group.

Wow what an AMAZING project so much detail I can see you really got involved in the theme here and totally rocked it.
ReplyDelete