

Hi everyone 😃
With my friends getting married in a couple of months, I wanted to make something nice for them to store notes, pictures, cards and wedding memorabilia. Therefore, I decided to create a wedding journal with the gorgeous Graphic 45 papers from Aunty Vera. What better way to celebrate Valentines and this month's theme "Heart of Mine" than to create something beautiful for others.
Firstly, I had to decide which papers from the "Love Notes" collection I would use for my pages and to decorate the cover of my journal. My choices were:
- Love Notes
- Romantic Rhapsody
- Melodic Missives
- Musical Masterpiece
- Standing Ovation
- Poetic Postage

I decided to recycle an old book for the cover and set about removing the pages with a craft knife. I then measured the width and length of the inside spine area and cut 2 pieces of recycled chipboard (or you can use cardboard) to these measurements, to fit snugly inside the spine area as reinforcement, making sure there was room either side of the board for the covers to be able to close easily. Helmars 450 glue was used to adhere one piece of board to the inside spine of the book.

I measured the width and height of the open book cover and cut my chosen "Love notes" papers for my pages ("Floral Symphony, Musical Masterpiece , Romantic Rhapsody, and Melodic Missives") about 1/2 of a centimetre shorter than these measurements (10" x 8 1/2"), so that my pages did not stick out from the cover. I also cut two pieces out of the "Standing Ovation" paper for the inside back and front cover and two pieces out of the "Love Notes" paper for the outside front and back cover (approximately 5" by 8 1/2"). I then found some vintage music paper and a cut-out from the "Poetic Postage" paper for embellishing the cover.

I scored and folded my Graphic 45 page papers at the five inch mark. I used pianola paper to back the music paper to make them both more sturdy and proceeded to put my pages in an appealing order to create two signatures (groups of pages) for my journal.

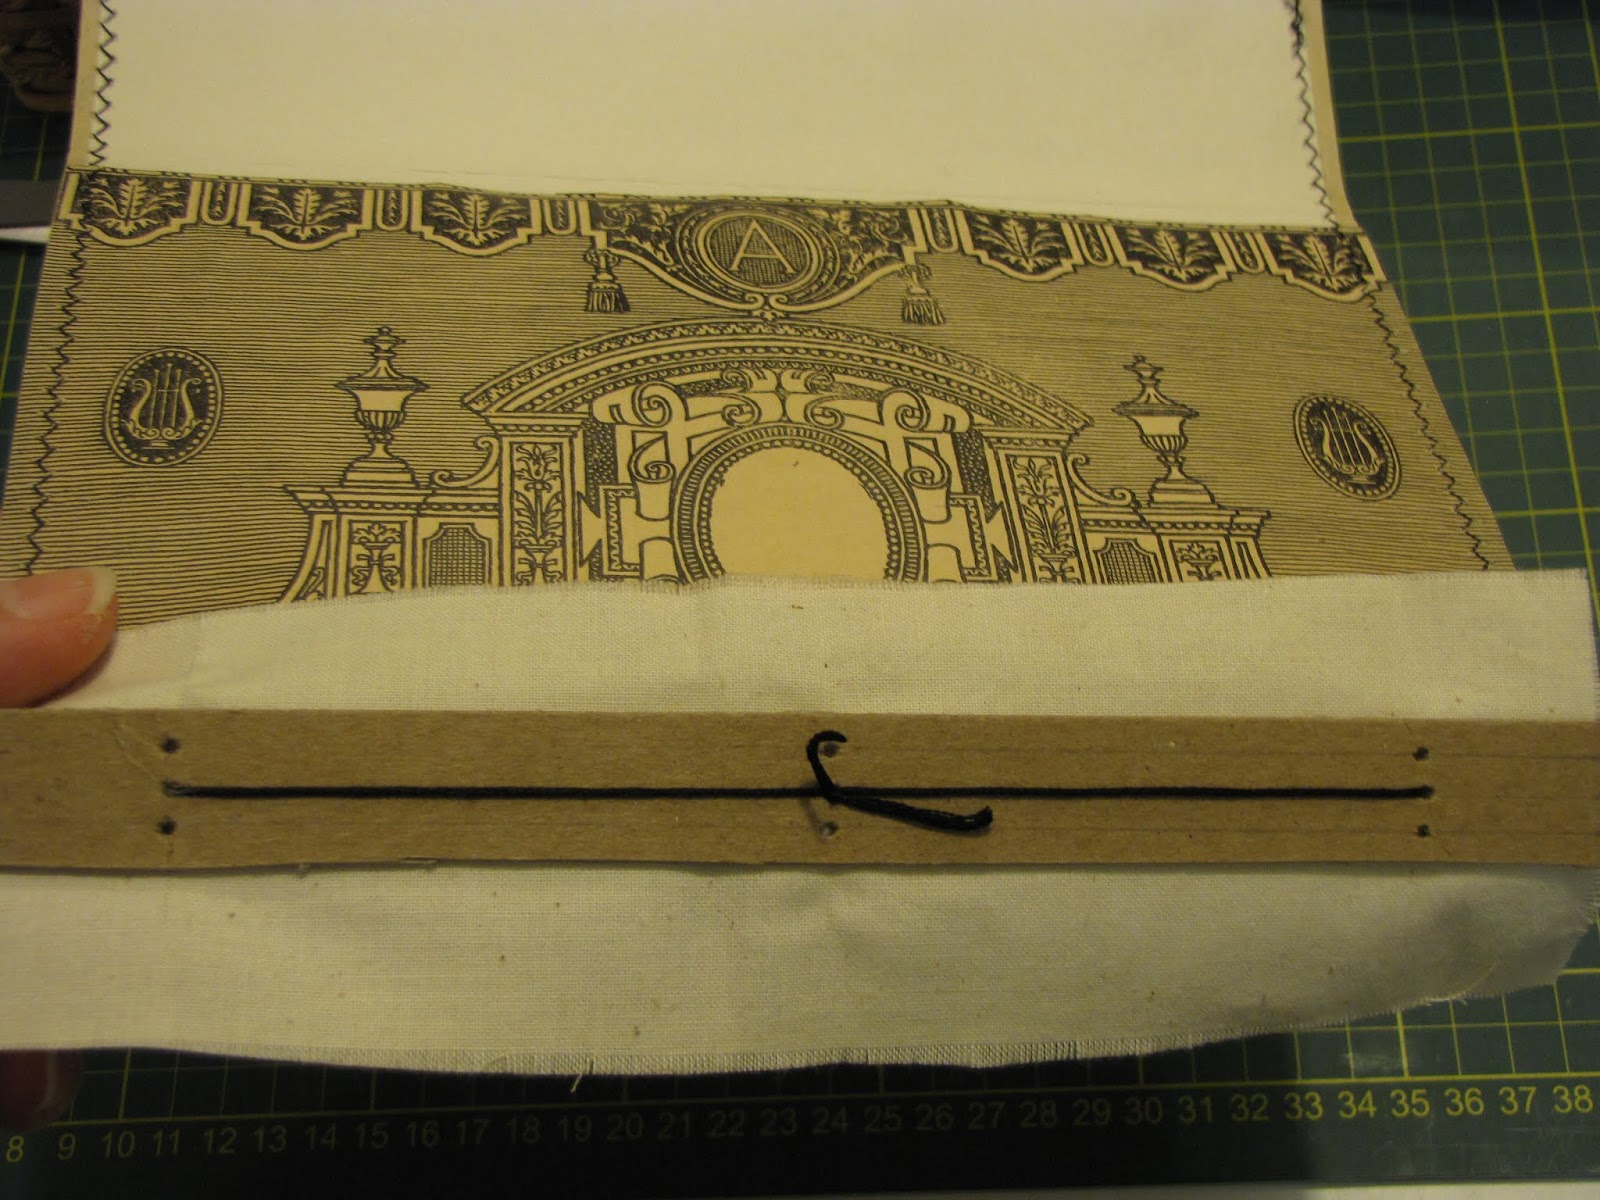
The start piece of many pianola rolls is absolutely gorgeous, and for that reason I have been hoarding them. My friends wedding seemed like the perfect time to start hacking into one, so I found one decorated in black, cut it down so the width was the same as my pages, backed it with some vintage writing paper and folded it into an envelope shape.


Is it not amazing!!!!! I used black cotton and my sewing machine to sew down the sides to form and strengthen the envelope.

I covered the inside front and back of the book cover with the "Standing Ovation" paper.

I found some calico, cut it the length of the second piece of board and about 3 times the width, and stuck the board in the centre of the calico. I wanted to use a three-hole pamphlet stitch to sew my signatures in and knew I wanted to sew three signatures in to this journal (I was counting the envelope as one), therefore I would put the middle signature in the middle of the board. I proceeded to measure evenly spaced lines and put dots in the centre of these and about 2.5 cm away from either end - this would be where I would poke holes for my signatures to be sewn in. Please refer to my video below for more detailed instructions.
I then used my awl to poke holes where each of my nine dots were.

I used one line of these holes as a stencil to create a template of the hole spacings on a piece of scrap paper that was about the size of the calico.


I bumbled and struggled to sew my envelope in to the middle set of holes in my card, as I had sewn it together - it was a struggle, but I succeeded and the outcome was worth it!
The Inka Gold "Lava Red" looks amazing rubbed on the very edges of the Graphic 45 papers I used as pages. A cotton tip was used for this application.

I sewed a signature in each side of the envelope and my journal was starting to take shape!


Now I needed to adhere the board with my signatures sewn in, to the reinforcement board in the spine of the cover. I saturated the back of the signature board with Helmars glue then carefully placed it atop the board on the spine and used my fingers and a ruler to press the boards together around and in between the signatures.

I then had to stick the fabric down either side of the signatures. I put glue in the gutter in between the boards and the front and back covers first, and used a ruler to press the fabric down into the crease. This prevents the fabric from becoming taught and damaging the papers or ripping off, and enables the cover to close better. Next I stuck the rest of the fabric down to the inside covers.

Now it was time to decorate the covers. I grabbed my chosen pieces and inked all the edges with "Black Soot" Distress ink, then set about deciding on placement and gluing them all down.

On the back I layered the "Love Notes" paper, a gorgeous cut-out and border piece from the "Poetic Postage" page.

I covered the book name on the spine with another border cut-out from the "Poetic Postage" paper.

On the front I layered more "Love notes" paper, music paper, little threads cut from some eyelash trim, a sweet "Poetic Postage" cut-out and a little "cherish" banner from the Kaisercraft "Rosabella" Collectables Die Cuts.

My process video can be found here:
Take care and have fun crafting,
Nat xxx

Wonderful. A brilliant gift and the paper is perfect for a wedding 💒
ReplyDeleteAwesome tutorial Nat, beautiful journal xox
ReplyDelete