Hi everyone 😊
I
have pulled out my Graphic 45 "Love Notes" paper scraps and stickers,
plus my other Aunty Vera Scrap and Craft goodies for February to begin
making the embellishments for my Wedding Junk Journal. Keep reading to
the end to see a flip-through of the completed journal!
First I cut a large tag from the "Musical Masterpiece" paper. To embellish
this I decided on one of the Nested Stitched Scalloped Heart die-cuts,
some old book paper and a black photo mat cut from my stash of
cardstock. I inked all edges with "Vintage Photo" distress ink.
Here is a process video on the tag:
Process video of the paperclip being made:
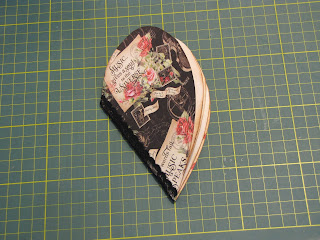
I wanted to make a small booklet to slip in under a belly-band I created previously, so I used the off-cut of a manila folder to freehand draw a love heart that I could fold out to see what it looked like opened. I used this as a template to trace the outline onto a folded piece of "Love Notes" paper. This made a gorgeous cover for my booklet.
I used the same technique to cut some pieces of tea-dyed paper and music paper, these were cut just a little smaller to fit inside the cover neatly. I grabbed a die-cut music paper heart to add a cute touch to the middle of the booklet.
I inked around the edges of all pieces then used my sewing machine and black thread to sew the page together down the center fold to create the book.
The final touch was to glue some black lace folded over the spine to add some flair and cover the stitching. This has created much more room for journalling, or little love notes 😉.
I
decided I would use two of the larger die-cut hearts as tuck spots on a
journal page so I inked around these and stuck them down with glue so
that the tops were open and ephemera can be slid in behind. I found
this beautiful die-cut tag that someone had gifted me and used a sticker
from the "Love Notes" Stickers pack to embellish it, and another
sticker for the bottom border. Some pianola roll paper was placed on
the back of the tag as a writing spot.
A simple, yet effective and beautiful place to hold more papers, photos, notes or tags.
Process video on these here:
Process video here:
It was so much fun making all of these embellishments to fill my journal with and now to finish the final touches ready for a flip-through of my completed wedding journal!
Here is the final flip-through of this beautiful junk journal. I cannot wait to give it to my friends!
Take care and have fun crafting!
Nat xxx


The embellishments look wonderful Nat xox
ReplyDeleteComing along nicely Nat. All your embellishments are soooo lovely.
ReplyDeleteLooking good Nat, This really is such great paper.. Love that heart book, I might have to borrow that idea from you sometime xx
ReplyDelete