Friday, November 29, 2019

I Think She Was an Aussie - Donna's Three Simple Cards


Hi all, 

I can not help myself, I like the Australia paper from Aunty Vera Scrap and Craft so much I had to create some Australian cards from it.. I created these quite simply as I wanted
the papers to be the highlight... 

Card 1...

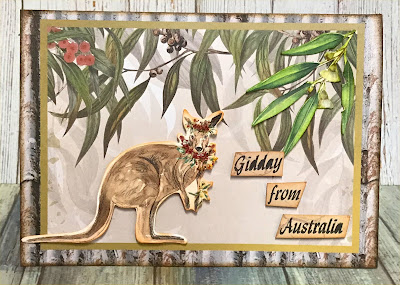
I cut a panel from one of the cut aparts and adhered it to a card front.. I placed a kangaroo from the KaiserCraft Collectables -Under the Gum Leaves with 3D foam tape on the front and stamped the greeting.  I cut the stamped greeting and adhered it with 3D foam tape. I went over the greeting and on all the flowers including the kangaroo with glossy accents to give some interest to the card..   


Card 2...

I love this cut-apart piece of paper and wanted the Galahs to be the main focus..
I simply added 3D Foam tape to the leaves and shaped them a little to give some 'life' .. I added a quote, two butterflies (EK Success), some dimensional magic and it is done..  


Lots of shine to make the Galahs stand out.. This is so pretty in real life..


Card 3...

Again I wanted the paper to be the main focus so I fussy cut the Galah from the Ephemera Set 
and adhered with 3D foam tape on a die cut Tree Branch (Tim Holtz).. I cut the Sunburnt Country heading of the Ephemera package set, again using 3D foam tape to adhere.  I used Black Nuvo Drops   for the eye and beak and some glitter on the feathers.


The three cards together which I love..


I hope I have inspired you
to create glorious things.
Hugs
Donna xx

Products 
You can purchase the items HERE
and check out the facebook group Crafty Vera and Friends to see everything the Creative Team will be creating throughout November.

.............................................................
My FaceBook page Donna's Fun Stuff HERE 
My Pinterest page Donmaree HERE
My Youtube Channel HERE
My Blog HERE
And don't to forget to say hi on Instagram donna.triffitt

Thursday, November 28, 2019

I Think She Was an Aussie - Wendy's G'day Mate Poster Board


G'day Mate Poster Board

It's time to dust off the cobwebs and get some paint on my fingers...!

In this month's Couture Creations Sunburnt Country paper collection, I fell in love with the galahs on the 07A sheet of paper. So, I really wanted to put it on a canvas and keep it to look at forever...heehee! BUT!!!...what does one use when you don't have a canvas laying around...hmmm, it was a dilemma! ...sitting on the side of my table was the Graphic 45 chipboard sheets, hmmm, would they work as a substrate? Well, that is exactly what I was going to use and I have to call it an experiment just in case it doesn't work...lol lol...(spoiler alert- it worked great!)


I cut that gorgeous Galah image out of the paper and grabbed myself a sheet of the Gaphic 45 chipboard and started my 'experiment'

I gave the chipboard a good coat of white gesso from my supplies and let it dry naturally. I wasn't sure if using the heat tool would warp the chipboard, so a good old natural dry was in order.


When the gesso was dry, it was time to add some colour on my substrate.
To start, I placed small dots of Kaisercolor around, really just mixing it up with the colours I chose. Then used my brayer to move all that yummy paint around the board. The kaisercolors I used were olive, dusty pink, sea breeze, yellow and spearmint. I also grabbed two of my Dina Wakley paints which were turquoise and lime.


Below is a picture of the first layer of paints after brayering them on. It looked pretty cool but was a little too boring for my liking, so I needed to add some more layers.


For the next layer of paint, I placed a small amount on my plate and grabbed a plastic card and started scraping some of the original colours on.


I was having so much fun just playing!

I did start to use my heat tool to dry the paint inbetween layers and was quite surprised the Graphic 45 Chipboard wasn't warping. It's pretty hardy to take all that.

Then I felt like scribbling so I used one my black aquarelle pencils and wrote or should I say scribbled a secret message over the painted board.


More 'play' time consisted of using some of my stencils.


...and also a number stencil where I brought in some black paint.


When I was happy with with my layers of paints and stencilling, I used my white signo pen and doodled around some of the stencilled shapes. I do find this to be very relaxing.


It was then time to work a little on the galah image. I used a black marker and went around the edges of the image as you can see below. This also makes your image pop a little off your substrate.


I then used a wet glue to paste the image onto my substrate...it's looking pretty cool now!


The small gap at bottom center was kind of bugging me, so I decided to add a good old Aussie slang 'G'day Mate'. I brushed on a small slither of white paint and pencil drew the outline and then used my black marker to go over it. Then I painted the rest of the wording to make it solid.


I splashed on some splatters in white paint and went round the outside with my black stabillo oil pencil and gave it a smudge with a baby wipe wet finger.

I am so very pleased with how my poster board turned out. I enjoyed experimenting. I had fun getting paint on my hands and I ended up with a gorgeous painting I can treasure forever.

You can watch the full process in the video below:


Have a Great Day!!
Wendy xox

Tuesday, November 26, 2019

I Think She Was an Aussie - Donna's Floral Canvas


Hi all,
How are we all doing today. 
I wanted to use this wonderful stencil I received this month from Aunty Vera Scrap and Craft and thought how perfect would it be on a canvas.. 


The canvas is a 10.2cm x 10.2cm and is already primed.. I used Distress stains by placing a little on the glass mat and using water and a paint brush, painted it over the canvas.


Let it dry thoroughly. 


I mixed some Modelling Paste  with Inka gold and spread over the the stencil on the canvas.


Looks pretty eh!


I die cut some butterflies from the Sizzix Tim Holtz Stamp Set - Entomology  and coloured them in.
 I only adhered them on the body to give the wings some lift. I thought it looked too plain, so drew around some of the flowers in a black pen to make them stand out..


A piece of leaf ribbon on the side, some pearls  and a fussy cut G'Day Mate from the wonderful papers and the canvas is finished.. 


You can see the shine with glossy accents on the heading which has 3D foam tape to give it some dimension.


I hope I have inspired you
to create glorious things.
Hugs
Donna xx

Products 
You can purchase the items HERE
and check out the facebook group Crafty Vera and Friends to see everything the Creative Team will be creating throughout November.

.............................................................
My FaceBook page Donna's Fun Stuff HERE 
My Pinterest page Donmaree HERE
My Youtube Channel HERE
My Blog HERE
And don't to forget to say hi on Instagram donna.triffitt

Monday, November 25, 2019

I Think She Was an Aussie: Aussie Scrapper layout "every moment matters"


Hello Crafty friends,

I am back with another layout featuring these gorgeous papers from Couture Creations.  This collection "Sunburnt Country" has been amazing to work with.  I cannot believe I have made 4 layouts with them and I do believe this is my favourite layout of the four.

Today's layout is about a captured moment I photographed of my son walking with his granny and her dog Simmi over the Troll bridge.  It's not a great photograph as I was far away when I took it but I love to document the everyday moments and these non-significant moments usually become the most precious.

This layout came together very quickly because as soon as I saw my photo I knew immediately what paper I was going to use and I already had an idea in my head.  I picked my favourite paper 08A and i use both sides of this paper.  Side A has the beautiful waratah and Side B has that beautiful wood grain.

The next step took the longest but was well worth the effort.  I fussy cut around the whole reef.


Now, that my reef is all cut out, this will be placed on top of the wood grain paper.

Time to work on my photo.  I decided my photos was going to need three matts to stand out from this busy background.  So in my scrap pieces of paper, I pulled out three pieces of paper that worked well with colours in my layout.


I had a smaller photo where you can see the troll bridge so I matted this photo the same as my main photo.

In my stash, I had this beautiful die-cut map of Australia which I received from a die swap we had here on this wonderful group, so I used my distress oxides to add some colour.  I believe the colour was bundled sage.


The title I made on my silhouette machine and then used some embossing powders to get the vibrant colour I wanted.  I hope you like the final result.

Head over to Aunty Vera Scrap and Craft to get your hands on these beautiful papers, just click on the link and they will be at your door before you know it. 


Friday, November 22, 2019

I Think She Was an Aussie - Wendy's Flowish Lap Book


FLOWISH LAP BOOK

I've noticed a small craze going round the journal making community lately where people are making Lap books and instead of putting it on my to-do list I decided to have a go at making one this month. Instead of a 'normal' type of lap book, I wanted to make this one more of a 'flowish' which can be used in conjunction with your journals.


A Flowish Journal was started by Rosemary Morris a few years ago based on the Flow Magazine. This is a put together journal where everything that is included can be used and pulled out to be incorporated in other crafting projects, so the signatures are not sewn or glued in.
A Lap book  generally consists of a paperboard folder such as a file folder with small pieces of  folded paper glued inside. These folded papers may contain facts, diagrams, illustrations related to the subject (in my case a flowish journal).

The Making:
I started the lap book by making a paper template to show the sizes of each panel I wanted.
I cut 2 large panels 7 inch by 5 1/2 inches (inside panel/cover front and back panels)
I cut 2 panels 7 inch by 5 1/4 inches (outside  panels flip outs)
I cut 2 small spines 7inch by 1 inch
I cut 1 large spine 7 inch by 2 1/2 inches


For a closer look at the pictures below:


Once I had worked out the size and the layout of each panel I cut the cover from the Graphic 45 ChipBoard Sheets and I must say these sheets worked a treat as the base cover for the lap book, very sturdy indeed.

When the panels were cut from the Graphic 45 chipboard, I used one long piece of calico from my supplies and glued each piece/ panel in order on the calico. I left a small over hang of calico to which I then folded over at the edges of the chipboard.


I let this dry for a little while and then grabbed some strips of calico and glued them over the three spines, making sure I used my bone folder to press into the small gaps between each spine panel.


Working on inside covers and spines...I cut out the backing pieces of papers for each panel and spines  out of some of my supply of patterned papers and these were cut 1/4inch smaller than the original sizes. I used my sewing machine to zig-zag around the edges of the papers and they were then glued to the inside of each of their respective panel size. Before gluing them on to their panels I also inked each edge with the Stazon Rusty Brown Ink which can also be purchased from Aunty Vera Scrap and Craft.


Above left to right before center spine

Above left to right after center spine

Working on the outside/front of the lap book:
I made a mat for each of the outside covers and spine. Cutting them 1/4 inch smaller than the original sizes. The bottom mats being from some craft paper folders (recycled) and the patterned papers from Couture Creations Sunburnt Country Collection numbers OA9, 10A for the cover panels and O5B for the spines. Before gluing the pieces together I used the Stazon Rusty Brown Ink and inked the edges  (I do like a good edge inking...lol) I then zig-zagged stitched the two pieces together. 


Before gluing them on their respective panels, I wanted to add a tie closure so I used a strip of calico and sewed down either side to stop any fraying. I then glued this to each inside front and back panel.

The panels are on either side of the large spine.


Then all the ouside cover panels were glued in their places.


...and at a different angle...

When I had all my inside and outside cover and spine panels glued down and left to dry, I used my Cropodile to put holes in the top and bottom spine panels. One hole top and bottom of the smaller spines and two holes top and bottom of the middle large spine. I placed an eyelet in each hole from my supplies and then threaded some black hat elastic through top to bottom eyelets.

after eyelets have been added...

...after elastic has been thread showing middle large spine...

Decorating and adding bits and pieces to my Flowish Lap book:
 This part of my process wasn't videoed but I do show the completed flip through of the book after all embellishments. I have included a lot of pictures from here on...


Front and back of lap book using the Couture Creations Sunburnt Collection paper and ephemera Pack. Also the Tim Holtz Thinlits Die Set under the cocky embellishment.


View of the Couture Creation Sunburnt Collection paper when the book is first opened.


First inside panel. I made a notebook for you to write all your wild ideas on. This is attached by a belly band.


First journal thread through one small spine. Cover is from Couture Creations Sunburnt Collection. It has been made from a large envelope. Sewn around the edges and there is a pocket in the back that holds a postcard floral tag with coffee dyed paper on back.


Second panel after small spine. I used floral magazine images to make some flip out pockets and each pocket contains a handmade tag. There are two flip outs and then the base has two pockets holding tags.


after opening the flip out pockets...


The large spine holds two file folders packed with goodies to use in your other projects.The first one being laces and fibers and the second one being Aunty Vera Scrap and Craft Washi and button bag as well as another smaller notepad that can be ripped up to use in other projects. These file folders have been covered with floral magazine images.


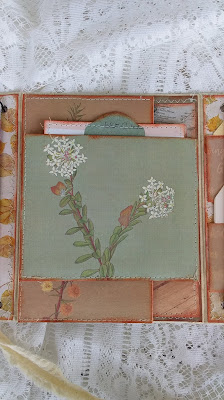
This is the panel after the large spine. I have made a multi-pocket which has five pockets in all.


The last smaller spine holds anothe flowish journal containing all different types of papers that can be used in other projects and also has a large pocket where I placed some Aunty Vera Scrap and Craft Doilies as well as some of my own napkins. And on the back of the journal cover is another smaller pocket with a card inside and a hidden tuck spot for more tags. Then finally, the last panel and I think my favourite is a double pocket panel which also holds the small flourish embellishments on bulb pins and some die cuts from the Tim Holtz Thinlits Die Set.


showing the calico tie...


Full view of the opened Flowish Lap Book.

To get a better view of the completed Flowish Lap Book
 you may like to watch the video below.
 It shows more detail and all the added items I have included.


I absolutely LOVE the finished project.
 I was quite surprised how sturdy the Graphic 45 Chipboard sheets were and
 I will definitely use this again as a journal cover.

Have A Great Day !!
Wendy xox
Related Posts Plugin for WordPress, Blogger...