Friday, September 29, 2017

See You in the Craftroom: Lolly's Gorjuss Coloring

Hello Crafty Friends!

What a fantastic day to end the week.... more GORJUSSness!! Today Lolly colours the Little Fishes Gorjuss girl. And have a look at what she does to bring the water to life... SO clever!


When I saw this Gorjuss girl stamp in the September kit, I knew I had to color her with Copic markers!


It's a bit intimidating coloring these stamps, because the photos are already so perfect!  How can my work compare? It's a nail-biting experience, but worth it!   I took my time and colored her all in one sitting.


You can see my notes in the margins above.  I was trying to keep track of the markers I used in the process, and sometimes I tested the values of similar colors.   Once I was done, I decided to frame her (thanks, Vera, for the idea), but I knew that I wanted a little something more for the water around her feet, so why not use acetate?  It would be difficult to cut the acetate the perfect shape, so I got out my light pad and traced the top margin of the water onto a sheet of printer paper.  Once I had that done, I lined up a sheet of acetate over that and taped it in place so that I could use the printer paper tracing as a guide to cut the acetate.


It worked well!    The acetate fits perfectly around the margins of the rock and her legs!


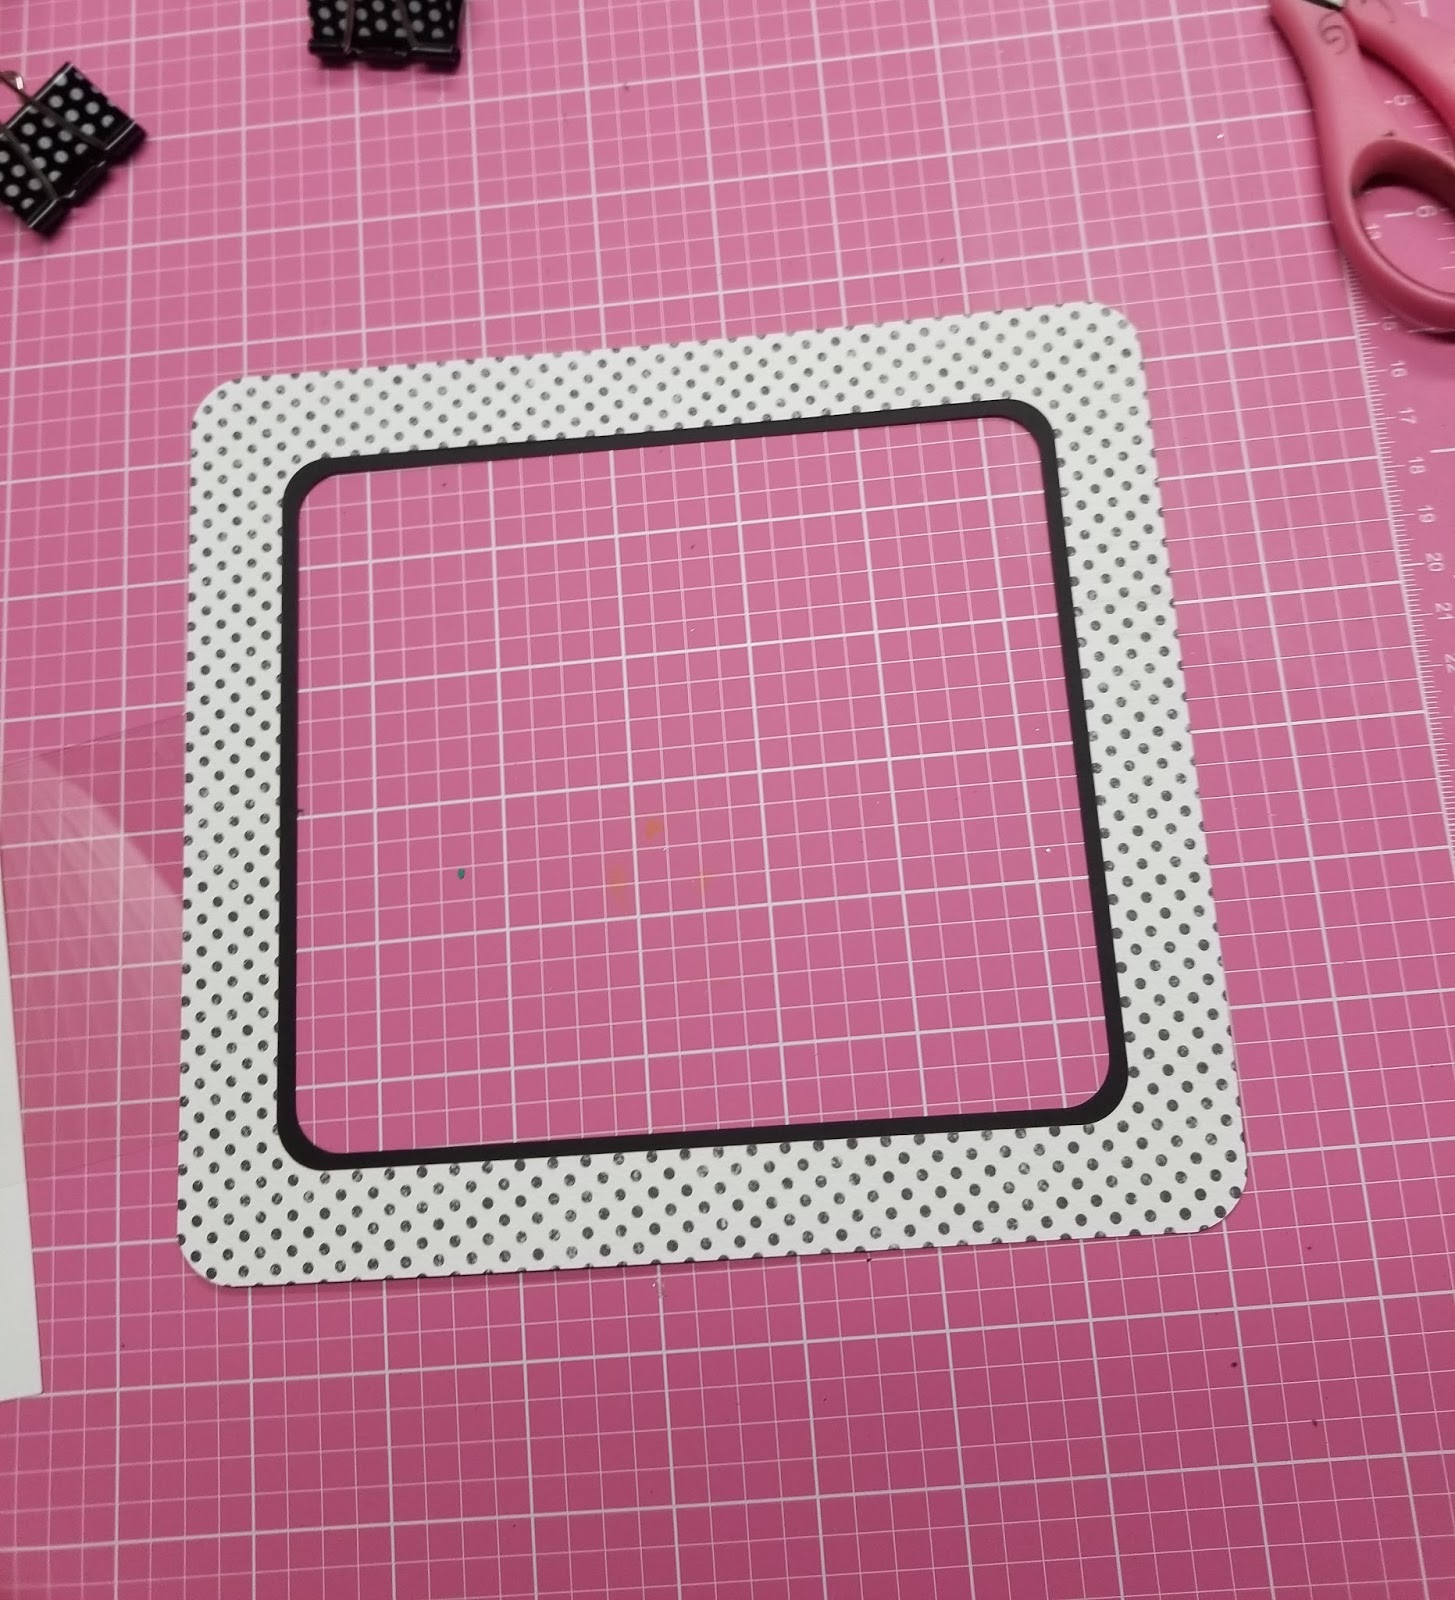
The overall image is rather large, so I needed a frame with an opening about 5.25" X 6" and didn't have any metal dies that size.  So I went to my Silhouette Design Studio to make a frame.  I ended up making a double frame, sort of like a photo mat, with the inner frame peeking through.  I wanted to see if I would like the dimensions, so I put the photo of my project into my SDS work area and created a mock-up of what the finished framed piece could look like:


I loved it sooo much, so I found the card stock I wanted to use:  solid black for the bottom layer, and a polka dot from Bo Bunny for the top.


I used Scotch Tacky glue to adhere the two.


Then I used my ATC to adhere the frame to the picture -- I knew liquid glue would not work over the acetate.  Once I did that, I had to cover the back, so I cut a back panel on the Cameo to match the exact dimensions.


Then on the front, I added tiny red rick rack (with FabriTac) and a sentiment (with Glossy Accents) that I die cut from black foam.  The foam really makes letters pop!


Can you "SEA" how the acetate makes that water come alive?

One day I might actually film the process of Copic coloring, but I'm a newbie, and there are many excellent Copic colorers on YouTube where we can learn techniques.

I squealed when I saw this stamp in the kit, and I know you will squeal, too, so hurry up and grab one HERE.

If you are a Copic colorer and want to know which Sketch markers I used, I have compiled a list:

FISH:   YG11,  G12,  G000
SEAWEED:   G99, G94,  YG67
RED DRESS:   R24, R29, R39
WATER:   BG11,  BG0000
HAIR:   C4, C5, C7
BLUE DRESS:   B14, B37, B41
ROCK:  E70, E74,  E79
SKIN:  E000, E00,  E21,   R20 (blush)


SEA you next time,
Lolly
http://www.LollyPalooza.net

Wednesday, September 27, 2017

Sea You in the Craft Room - Suzanne's 8 x 8 inch mixed media canvas

Hello Crafty Friends!
Does our September Kit make you want to create a special little piece of Underwater World that you can look at every day? Well have a look and SEA what Suzanne has been up to......


Hi everyone.  Well, I must say that I have enjoyed the 'sea you in the craft room' September kit so much, I just wanted to create more and more projects with the beautiful and versatile craft items that Aunty Vera included in the kit. 

For this project I decided to have a go at a  mixed media canvas.  It was very fast and so much fun to create.  I really love mixed media.  It is so freeing and you can pretty much do whatever you like with whatever you have on hand.

I started with a white 8 x 8 inch canvas


I added an 8 x 8 inch piece of paper from the September kit.  I used the one with the little yellow submarine on it.  I distressed all the edges before gluing it to the canvas with gel medium.


I went over the top of this paper with transparent gesso.


I used some shells that I had coloured with old silver Inka gold paint, an air dried clay starfish that I painted with the ocean blue Liquid pearls, some swirling leaf die cuts, a seahorse which has the beautiful washi tape from the September kit added to it, an anchor that has been heat embossed with copper embossing powder, a piece of fishing net and I used some more of the hessian from the kit and a sentiment from the Under the sea paper. 


Here I have started laying out my elements and sticking them down with Gel Medium.  Gel Medium dries clear and is very strong.  I takes several hours to dry completely.


Adding more elements being very liberal with the gel medium to make sure things are going to stick down


After the gel medium had dried I used more gel medium to add the smaller elements like art stones


Adding German glass glitter shards from the September kit, some blue microbeads and some clear glass beads after I had added the art stones.


I also added some 3D fish and a turtle stickers that I had in my stash


I used the stencil from the kit to make some bubbles


I fussy cut the octopus from the Echo park papers to add to the canvas.  I popped him up on some foam tape.


This sentiment is from the bottom of the Echo park paper in the September kit.

Here are some close up shots of different parts of the canvas


 Here is the finished product.  I really had a lot of fun doing this canvas. 

Thanks for having a look at my mixed media canvas.

You can see a quick video of my canvas HERE.
You can get the September kit HERE.


Tuesday, September 26, 2017

Sea You in the Craftroom: Lolly Has Fun Using 4x6 Cards

Hello Crafty Friends

Aren't 12x12 double-sided paper manufacturers just evil?! Giving us papers with beautiful designs on one side and..... gorgeous designs on the OTHER!!! If you feel sad creating projects that only show one side of your papers then you'll LOVE Lolly's clever 4x6 cut-aparts card featuring both sides of a cut-apart design paper......


Whenever I get my hands on a sheet of 4X6 cutapart cards like this in a kit, I go bonkers!


The cards are so fun and so intriguing, and I always want to cut them up and use them, but then there is a dilema -- I like the back of the cards, too!  How can I use the cards in a way that both sides of the card are visible?  I decided to make a greeting card with this paper, and I filmed the experiment.

First, I knew I wanted the cards to remain attached to one another.  I removed the "ocean waves" card and the submarine card (bottom two on the right), leaving the other four attached.


The top two are the card base, and the bottom two fold up into the card base.


I added another piece of  patterned paper to the back of the card, leaving an opening as a pocket.


Then I made a tag to go in the pocket and sewed some coarse wired ribbon onto it.


Embellishments on a flat card need to be flat as well.  I mean that if I had added buttons and thick embellishments to any of the parts of this card, it would not have folded up correctly.  I used some Glossy Accents, glitter, and also some Perfect Pearls from the kit.  I also cut some tiny images from the paper collection to add to the cards.  I used the PixScan mat for the Cameo, and  you can learn how HERE


I also wanted an envelope, so I made a top-loading envelope.  I took a 9 x 9 3/4" piece of patterned paper, and on the short side scored at 1" and 7 3/4".    On the longer side, I scored at  2 1/2" and 7 1/4", and then I cut off the outer corner rectangles and folded it into an envelope.


I added one of the smaller cutapart cards from the collection, but I also wanted to use up some of my scrap papers to frame that card, to I offset the papers behind the card, and it worked well.  You can see that neither the red nor black papers are large enough to frame the entire card.


The card could be a super quick card, especially without liquid embellishements (no drying time needed then), and is a great way to use those 4x6 cutapart cards.

I have the entire process HERE.

Run over to Aunty Vera's website and snatch up one of these kits HERE before they are gone!
You'll be glad you did!  I'll be glad you did, too!

Thank you for coming to SEA what I've been up to!
Lolly
http://www.LollyPalooza.net


Thursday, September 21, 2017

Sea You in the Craft Room - Suzanne's 3 Seaside Cards

Hello Crafty Friends!

Suzanne has been busy creating spectacular underwater backgrounds for her Seaside cards. Have a look below and click on the link at the end of the post to SEA her creating process....


Hello and ahoy my crafty friends.  The September kit from Aunty Vera Scrap and Craft is an absolute beauty for land lovers and us sea loving folk alike.  I have been having the best time with the kit. I hope you can get your hand on one before they disappear.

For this project I made three cards.  All three cards have the same kind of background.  I made  these interesting backgrounds with a piece of 5 1/2 x 5 1/2 inch white card stock, some mod podge, the colour burst from the August kit, gesso and the white backing of some napkins that I have been using for different projects.

First, I crunched up some of the napkins and applied this to the cardstock with mod podge.


 I added 3 or 4 layers of crunched up napkin backing with mod podge and dried between layers with my heat gun
  
When placing the napkin on the surface I make sure to have lots of bumps and lumps before flattening them out.  This ensure that your surface will have lots of texture.  The more lumps and bumps the better. 

 I then used a white piece of napkin and wet it thoroughly before sprinkling it with the colour burst from the August kit.


Sprinkled with color burst


After sprinkling with colour burst, I wet it some more to spread the colour


I then dried the napkin


And then I crunched it up


   I then mod podged this to the other layers.  A note of warning here folks, the color burst will react with the mod podge, so do not put your brush back into your mod podge.


I poured the mod podge on to eliminate any chance of getting blue into my mod podge


This is what it will look like when the pod podge dried.  This would also make a terrific background, but I was looking for a different look.  I wanted it to look like peeling and cracking paint.


Then I used Gesso to scrape over the entire surface


Scrape the Gesso across the surface


Dry this surface with the heat gun.


A close up of all the texture that you can get using this technique.


These are the three background that I ended up with using this technique.  Each a little different.  Sometimes I added a little water to the gesso so that it was a little thinner to get a different look.


CARD 1
For the first card I used one of the 3 x 4 cut a parts from the  Echo park 'under the sea' collection which is in the September kit.


I also used one of the Santoro Gorjuss girls stamps from the kit and coloured it with my prismacolor pencils


 I also used the Little B washi tape to cover some cardstock and then diecut a seahorse. I used the liquid pearls to add his eye


The beautiful ocean blue liquid pearls was perfect  to colour an air dry clay star fish.


I added some matte gel medium to adhere some German glass glitter shards to the star fish. I used some inka gold to colour some other air dry clay shells.


 Some of the hessian ribbon was perfect to layer under the 3 x 4 cut apart.


 I also layered the background onto another piece of the echo park paper which I distressed before putting this on a white card base.


Here is the finished card.


CARD 2

The next card I made is a shaker card.
I die cut a frame and coloured it with the ocean blue liquid pearls and added an acetate piece for the windows


I cut several layers to make it thick enough to form a shaker.


I used a piece of paper from the Under the sea collection to be the background as it already had some fish and bubbles on it.  Don't adhere it to the back yet.  Just place it where it needs to be to be able to place some more elements.


 I then used some of the little Doodlebug shape sprinkles inside the frame to create an underwater scene. 


Some German Glass Glitter shards, blue glitter and some blue micro beads were used for the shaker.


Place the shaker bits into the window area before adding the background paper


 More of the hessian ribbon was used as a layer underneath the sentiment which came from one of the 4 x 6 cut a parts.

Here is the second finished card.


CARD 3

This last card is my favourite because I have used my favourite thing from the September kit.  The Gorjuss girl is just so lovely and for this card I used my watercolour pencils to colour her.


I used one of the sentiment from one of the 4 x 6 cut a parts from the under the sea collection from Echo Park and layered this sentiment on a piece of watercoloured paper that matched the Gorjuss girl's outfit. 


I also made some little flower to add to the top left hand corner of the card and to the bottom of the sentiment.


Thanks for taking a look at my cards.  I hope you like them.

You can see a video showing how I made the backgrounds HERE.
You can see a video showing my three cards HERE.
You can get the September kit HERE.

Thank you for joining me today
xx Suzanne xx


Related Posts Plugin for WordPress, Blogger...