Wednesday, October 30, 2019

Nervous at Night - Donna's Loaded Paperclip Art and Candy


Hi all,

How are we today? I still feel unwell but it is what it is. 
Today I have created some loaded paperclips to place in the Loaded Hand Bag.
If you know me at all, you will know I love making paper clip art and I couldn't resist with Halloween.. 

I fussy cut this house from the fun paper and coloured in the windows with glitter pens..
I then went around all the windows with a black pen to highlight them.....


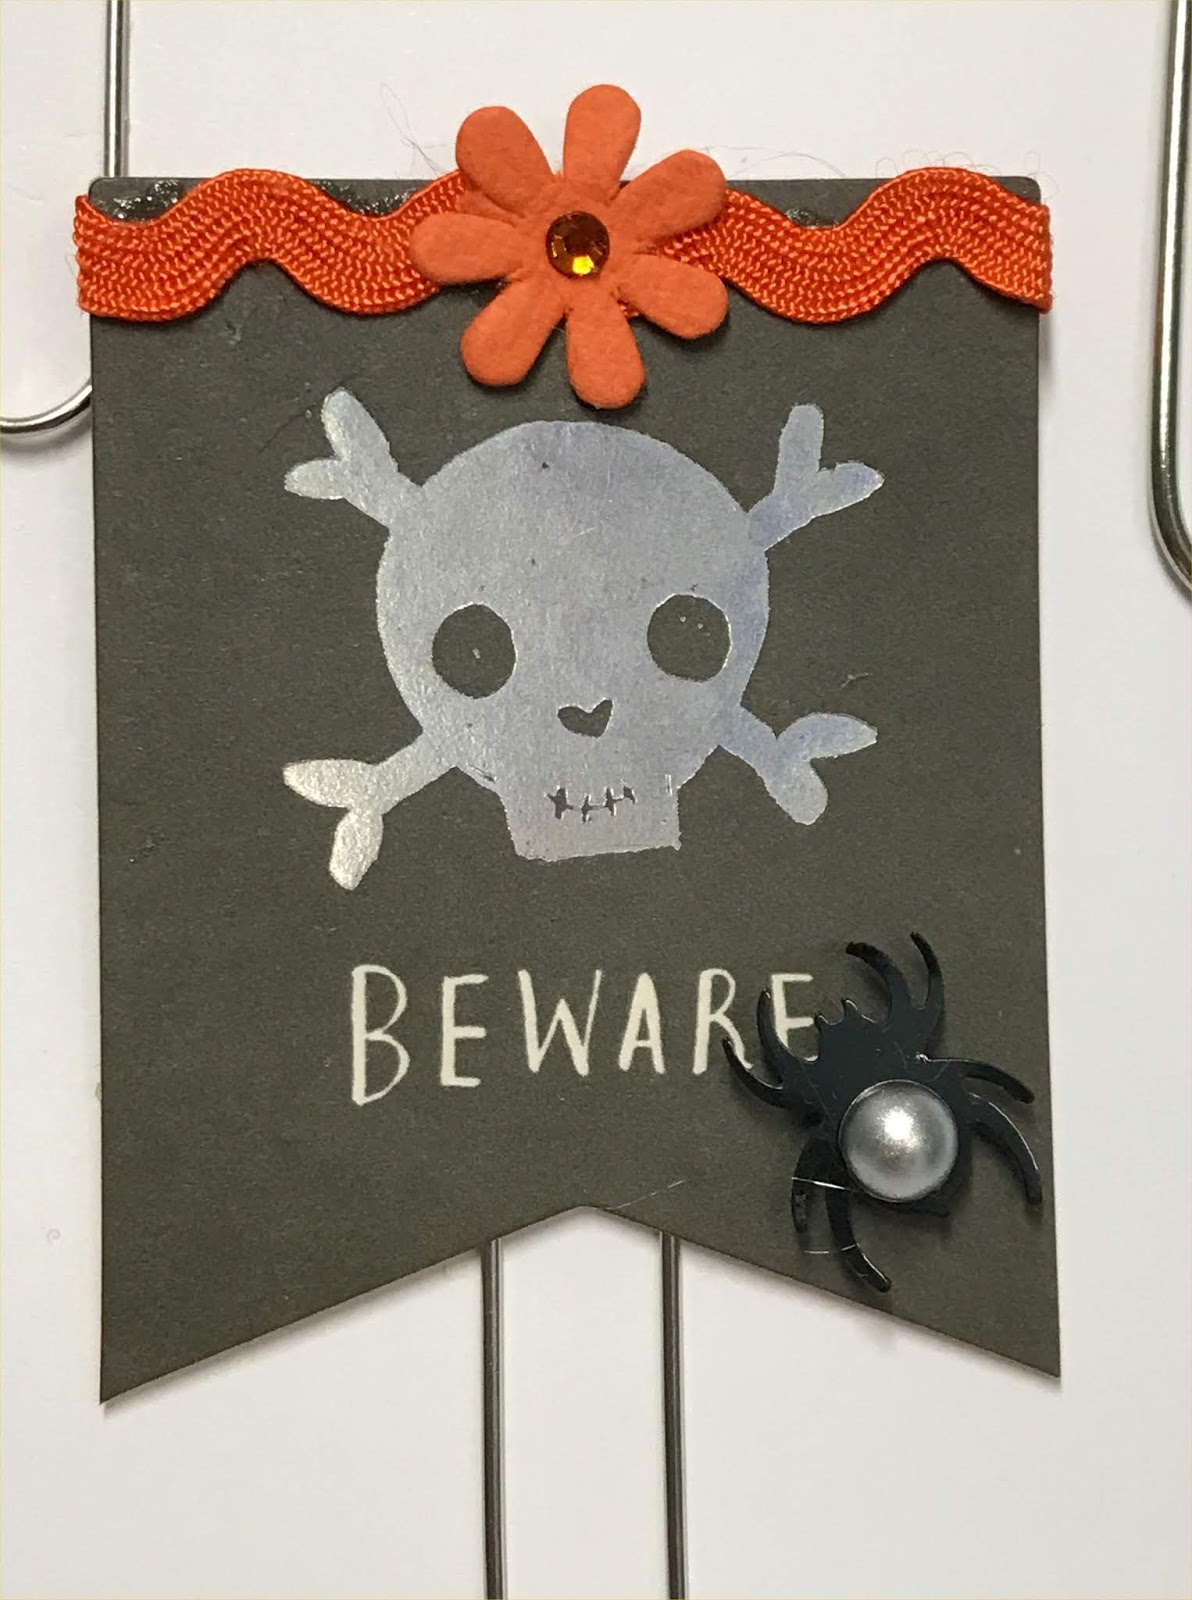
This little happy skull was in the Hey Pumpkin Ephemera Pieces  , All I simply did was place some ric rac, a flower and a beaded spider and it looked really happy.


On the back I punched a 1 inch cat face and cut the actual heading of the paper Hey Pumpkin for decoration. I placed dimensional magic over the face and sprinkle a tiny bit of glitter for contrast.


Another piece of Ephemera pieces on top of some string and a cobweb with two little spiders and what more did you need..


Have to love the ephemera pieces and this bat is no exception. he is 2 inches wide and I loved him.. some circles for the background a bit of lace and it was done.


Frankenstein, who is very friendly by the way, was simple to do by punching out his head and coating with glossy accents..


The back of Frankenstein, a sparkly cat . Who doesn't love a black sparkly cat..


All five together. 


I placed each on a piece of cardstock and then into a plastic bag after placing a strip of the gorgeous washi tape from Aunty Vera Scrap and Craft..


The loaded finished paperclip art bundle..


I also decided I wanted to use this Halloween Stamp set so as to use all of the stamps in one project so I created a bag for candy..


I stamped all the images and heat embossed them in clear embossing powder. 


I cut all the images into squares ready to colour..


I so wanted to use this cut-apart from the fun papers and this was ideal for this project.. I cut it down a fraction to place on the piece of white cardstock which I then folded over and adhered it to the clear bag filled with lushiness.. 


Now who wouldn't want to receive this candy? 


The loaded items in  the Hand bag..


 I hope I have inspired you
to create glorious things.
Hugs
Donna xx

You can purchase the items HERE
and check out the facebook group Crafty Vera and Friends to see everything the Creative Team will be creating throughout October.
.............................................................
My FaceBook page Donna's Fun Stuff HERE 
My Pinterest page Donmaree HERE
My Youtube Channel HERE
My Blog HERE
And don't to forget to say hi on Instagram donna.triffitt

Tuesday, October 29, 2019

Nervous at Night - Gina's Halloween pocket letter


Since I love Halloween and I love pocket letters, what better way than to end the month with a Halloween pocket letter!

I will go through it one pocket at a time. For the first pocket, I've cut one piece of Crate Paper Hey Pumpkin "Creepy Crawly" at 3.4" x 2.4" and another piece at 3.3" x  2.3" I've inked the edges of both pieces with black ink and stuck one on top of the other front to back. I've stuck the spider from the Tim Holtz Idea-ology Adornments - Halloween in the middle of the spider web. I then stuck the "Treat yo self" die from the Echo Park Trick or Treat Ephemera under it.


The second pocket and the eight pocket are similar. I've used the Crate Paper Hey Pumpkin "Beware" paper cut at 3.4'' x 2.4'' and 3.3'' x 2.3'', inked the edges with my black inkpad and stuck them one on top of the other, front to back. The card in the second pocket has the "October 31" from the Echo Park Trick or Treat Ephemera pack which I have raised using some chipboard and for the eight pocket, I have fussy cut the pumpkin from Crate Paper Hey Pumpkin "Treats Please" paper which is also raised using chipboard.


The third and the seventh pocket are also similar. For these pockets, I have used the Crate Paper Hey Pumpkin "Ghostly'' paper cut at 3.4'' x 2.4'' and 3.3'' x 2.3'', inked the edges in black and then stuck them front to back. In the middle of each card, I have stuck one of the cut outs from the Crate Paper Hey Pumpkin "Eeek" paper. I've inked the edge of each piece with my black inkpad. I've then fussy cut the ghosts that go around them from the paper and stuck them on, raising them with chipboard.


For the fourth pocket, I have used the Crate Paper Hey Pumpkin "Scaredy Cat" paper cut at the same measurements as above, inked the edges in black and stuck them front to back. I then fussy cut the houses, a pumpkin and a bat and cloud from the Crate Paper Hey Pumpkin "Happy Haunting" paper and layered them on top. I love the eyes peeping out over the chimney there.


For the fifth pocket, I've cut two pieces of Crate Paper Hey Pumpkin "Treats Please" paper (same measurements as above), inked the edges in black and stuck them one over the other. I cut 4 bits from the Crate Paper Hey Pumpkin Creepy Crawly paper to make a frame on the 4 corners.


The sixth pocket uses Crate Paper Hey Pumpkin "Scaredy Cat" same as pocket 4. On this card I've used the Regions Beyond Sizzix Tim Holtz dies. I've die cut the candle, the smoke and the crystal ball onto Crate Paper Hey Pumpkin "Candy Corn"paper. I've fussy cut the trick or treaters from the Crate Paper Hey Pumpkin "Happy Haunting" paper to go in the crystal ball and covered it with my Ranger Glossy Accents. The "Hello" is cut from the Crate Paper Hey Pumpkin "Pumpkin Spice".


For the 9th pocket I used the Crate Paper Hey Pumpkin "Creepy Crawly" paper again. I've cut out the "Hey Pumpkin" from the Crate Paper Hey Pumpkin "Eeek" paper and die cut the bottles on various off cuts using the Tim Holtz Regions Beyond dies.


I then put all the pages in the pockets On the side of the pocket letter, I have stuck the Paper House Harry Potter Patronus washi tape. I have inserted the My Mind's Eye Trick or Treat brads where the 3 holes are. On the top I have stuck the little flags that came in the Echo Park Trick or Treat Ephemera pack. At the top I have stuck a thin strip of Crate Paper Hey Pumpkin "Happy Haunting" paper over the flags. I have also fussy cut the "Happy Halloween" from the Crate Paper Hey Pumpkin "Pumpkin Spice" paper and stuck it over the last row of pockets Here's a picture of the completed pocket letter.


Wishing you all a spooktakular Halloween!

See you again soon. Till then stay awesome!

Gina xx

Sunday, October 27, 2019

Nervous at Night - Bella's Shadow Box


Hi everyone. Today I have a project that I made for my daughter Bella, who requested a ''spooky scene that lights up''. The whole project along the way was made with her choices from the colors to the Idea -ology Clipping in the box.


I started by making the house. I used Tim Holtz - Woodgrain Paper and colored it with Distress Spray Stain - Pumice Stone and Weathered Wood. I also used Distress Ink - Black Soot to highlight the knots.


Next I cut a template of the old church and used this to cut out a piece of black cardstock slightly bigger.


Cut the colored woodgrain paper into thin strips ( I cut mine 1/8'').


Start gluing the strips on to the black cardstock beginning at the bottom working your way upwards making sure to overlap each one slightly.
Place the die on top and run through the die-cutting machine several times. Because this is a thinlits die it will not cut all the way through but it will be easy to cut it with a craft knife.


 I placed some Mica Tiles behind the windows and door.


The next step was to make the frames. My daughter had a lot of fun with these and I must say I am pretty impressed with her efforts.
She started with Tim Holtz - Idea-ology - Baseboard Frames.


Painted them with Black Gesso and then applied Little Birdie - Two Step Crackle Medium.


She was pretty happy how the turned out. She added a few other colors of distress stain and Oxides but she couldn't remember what colors she used.


To make the background I cut a piece of watercolor paper to fit the inside of the box. I then cut a small circle for the moon and placed it on the background. I sprayed Distress Oxide Spray - Frayed Burlap over the paper and then used different colors of blue Distress Ink.


 I finished it off with black soot to give it more of a night sky look. Bella added a little stenciling.


The box was just one I purchased from a discount store, which we painted black. Glue the background to the inside of the box.


I added some Mini Copper Wire lights.


I just poked a small hole and threaded them through. They are light and thin so they don't bulk out at the back.


I cut out a small stitched hill and glued the church onto black foam.


I added some little bats and the quote from the Tim Holtz - Idea-ology - Clippings Stickers - Halloween, Followed by the larger frame. 


To finish the Shadow Box I glued the second frame over the top. The trees were made using the Sizzix - Tim Holtz - Bigz Die Set - Branches which my daughter made the same way she did the frames. On the top I added one of the Tim Holtz -Idea-ology -Adornments - Jolly Roger which was painted black and a Tim Holtz - Idea-ology -Story Sticks - Halloween. Finally a few spider webs made with the hot glue gun and Bella is loving her creation.


I loved spending the time with my daughter making this project and she loved it so much that she can't wait for our next project together.

I hope you all enjoyed this project.

Here is a list of the products for this month.


Core Products

Crate Paper 12 x 12 sheets - Hey Pumpkin
Tim Holtz - Idea-ology -Story Sticks - Halloween

Chosen Products

Tim Holtz - Idea-ology - Clippings Stickers - Halloween
Crate Paper - Hey Pumpkin - Ephemera Pieces
Tim Holtz -Idea-ology -Adornments - Jolly Roger
Tim Holtz - Idea-ology - Trimmings - Halloween
Stampers Anonymous - Etcetera Tags Mini
Sizzix - Tim Holtz - Bigz Die Set - Branches
Authentique - Twilight 12 x 12 Sticker Sheet - Details Two


All the products listed can be purchased HERE at a discounted price

Thank You and Happy Crafting
Tina xxx

Thursday, October 24, 2019

Nervous at Night - Donna's Loaded Frightening Faces.


Hi all,
I love creating Halloween projects for Aunty Vera Scrap and Craft  - (AVSC) and these tags using the
frightening-faces dies  from Tim Holtz was a favourite of mine.

I die cut all 12 faces from 2 inch circle orange cardstock and 12 backgrounds from 2 inch circle  black cardstock.  


I cut 1/2 an inch off a sealed envelope measuring 3 1/2 inch x 6 1/2 inch as shown.


I matted the back and front with black cardstock and paper from the Hey Pumpkin range.


On all 12 tags I placed a eyelet to hold some ribbon. 
On several tags I placed glitter in the faces.


On other tags I placed Dimensional Magic on the faces. I also inked around all of the tags with orange ink . 


I tied a black piece of ribbon through the eyelets.


A cat face.


The scariest face for sure.


All 12 tags and the decorated loaded envelope.


The finished loaded envelope. I adore how this turned out and is one of my favourite projects. Can you see the Halloween Clipping Stickers which is my favourite item from this month's items..  


I hope I have inspired you
to create glorious things.
Hugs
Donna xx

Products are:


You get a great discount on all products used by the Creative team this month..


You can purchase the items HERE
and check out the facebook group Crafty Vera and Friends to see everything the Creative Team will be creating throughout October.

.............................................................
My FaceBook page Donna's Fun Stuff HERE 
My Pinterest page Donmaree HERE
My Youtube Channel HERE
My Blog HERE
And don't to forget to say hi on Instagram donna.triffitt

Related Posts Plugin for WordPress, Blogger...