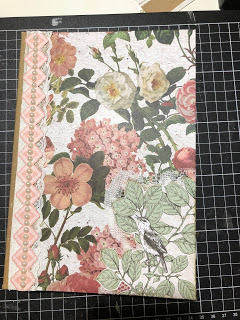
For my challenge I decided to do a memory journal. The idea is that it is a snapshot of you (the crafter) as you are right now. It is a place where you can write, put photographs of things that are important to you right this minute. Something you can look at in the future and have a laugh (or cry when you see how much weight you have put on) about. A place to store those little bits of information that might be different in a years time, like your favourite food or current crafting obsession.
To begin you need to make a journal.
I used the following items.
Everlasting Paper Pack from Kaisercraft
Sew Easy fancy floss by We are Memory Keepers
Recycled cardboard packaging
I started with a small cardboard box that was a good size.
You could also cut down a cereal box or use some other cardboard to make the
cover. I opened it and cut it down to the size I wanted.
The next step is to choose the paper you want for the cover
and cut it to fit. I choose Amore from the Everlasting paper pack. I cut two pieces that were about a centimetre
bigger on the top, bottom and side so that they could be folded over to make a
nice edge.
I then put double sided tape around the edges of the outside
front cover.
The next step was to attach the (Amore) paper, making sure
there was about a centimetre overlapping to fold over. I used double sided tape to attach the
paper to the inside cover.
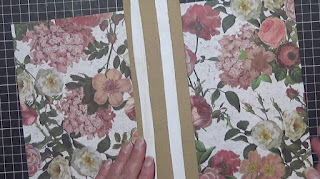
Then cut a strip of paper for the spine, I used the reverse side of the Amore paper.
It needs to be the length plus 2 centimetres long and wide enough to cover the
spine with about 3 centimetres overlap.
Attach it with double sided tape.
To cover the inside cover I used the flower side of the
Blushing paper. I cut one piece to fit
across the inside of the cover and used two sticker strips to fill in the small
space left. This may not be necessary if
your journal is narrower than mine.
Time to decorate the front cover. I used some of the stickers from the
Everlasting paper pack sticker sheet, some vintage lace and curtain lace. I also added a strip of sticker pearls from
my stash.
To make the signatures you will need to choose the papers
you wish. I choose 1 page of each of the following from the paper pack;
Blushing, Flowers, You and me, Bloom and
XO. Each page will need to be cut down
to fit inside the cover allowing each page to be folded in half.
The signature is then sewn into the cover using a 3 hole
pamphlet stitch. Use a template to make
sure the holes in the cover match the holes in the signature.
Using the green thread from the Sew Easy fancy floss
pack I began in the centre hole, poking
from the inside to the outside. Then back in the outside top hole right down to
the bottom inside hole. Then back to the
outside middle hole. Be careful not to
poke through the thread already there.
Making sure your two ends are either side of the thread tie a double (or
triple) knot.
I finished my journal with a label on the front and a corner
folded pocket on the front inside cover.
Your journal is now ready to add photos, pockets and tags,
journaling spots or any other things you wish to add that reflect you at this
time.
Please see my Youtube channel for a process video on how I
made my journal and what I add to the journal.
Enjoy preserving your memories.
And Go Team Sue!


No comments:
Post a Comment