Showing posts with label Aunty Vera Kits. Show all posts

Sunday, December 23, 2018

The Stars Are Brightly Shining - Donna's Accordion Card

Hello Crafty Friends!
What a beautiful card from Donna! I'm not surprised she decided to keep it as a decorative piece!


Hi all,
Oh my goodness Christmas Day is closing fast.. I wanted to show you the special card I created with the glorious kit from Aunty Vera Scrap ad Craft.. I just adore it..

I used the two dies as shown from Sizzix..


Cut one base from cardstock and cut off one tab on one of the pieces. place some strong adhesive on the other tab as shown.. 


Join the two bases together..


Cut two frames from 2 different pieces of the gorgeous paper in the kit..


Adhere both frames on the base as shown as well as the centre pieces..


Place strong adhesive on the tabs and adhere the card together as shown..


Cover the tabs with the washie tape from the kit..


Add pieces from the ephemera pack to your design..


Love that angel..


How cute is the tree and presents..


 The view from the top of the card..


I added the buttons for visual effects but loved the idea so much I think I will make this a part of my Christmas decorations in my home..


How cute are these buttons from the kit..and with some of that gorgeous trim under them..


The tree with all the decorations from the kit I created..  


I hope I have Inspired you to 
create glorious things..
Hugs
Donna xx

You can purchase the kit HERE 
Check out my Facebook page HERE
And don't forget to have a squize at my blog HERE

Thursday, December 20, 2018

He's Making a List - Suzanne's Altered Christmas Embroidery Hoop

Hello Crafty Friends!
Suzanne has a beautiful Christmas decor project for us today. Check out her altered embroidery hoop - it's just magical!


Hello everyone, I hope you have all been enjoying some wonderful Christmas crafting time and that you have finished all your Christmas shopping. 

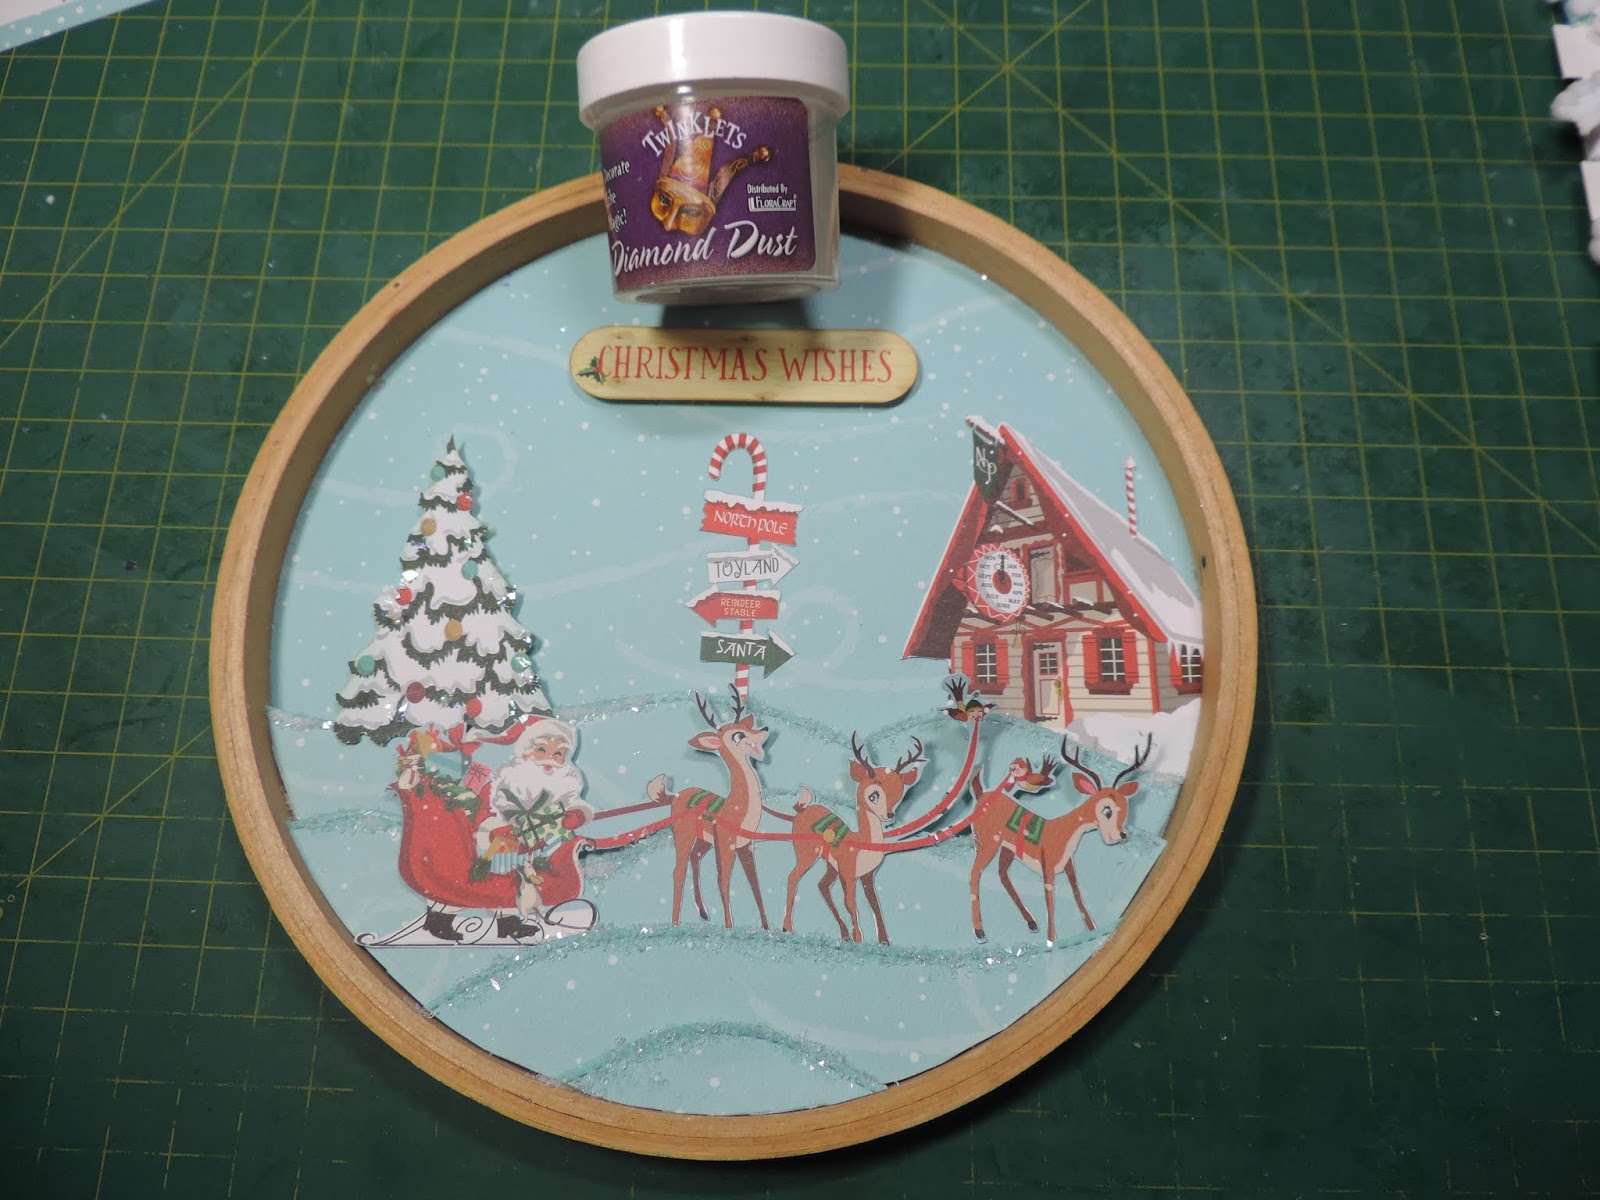
This project was such a lot of fun and so very simple to make. I used an eight inch embroidery hoop and some of the beautiful papers and ephemera pieces  from the Carta Bella range to decorate my hoop.  I also used the gorgeous Heidi Swapp trims for this project.

I traced around the outside of the hoop onto the paper I chose for the background and cut it out.


Using the same paper, I cut hillsides to layer onto the background.


I fussy cut the images I wanted to use for the altered hoop.


I added dimensional dots to the back of the hillsides.


I attached the hillsides to the background with dimensional dots between each layer


Here you can see all the dimension


I have placed the different fussy cut elements on different layers of the hillside.


I used the white pom pom trim to go around the hoop


Diamond Dust adds a touch of sparkle to the hillsides


I used the gorgeous blue ribbon to make a double bow for the top of the hoop.


Here is my finished embroidery hoop.


Thank you so much for having a look at my Christmas Embroidery Hoop.  I would like to wish you all a very Merry Christmas and thank you for all your support throughout the year.  I really appreciate it. 

You can watch a short video of my project HERE.
You can purchase the Christmas Kits HERE.

Bye for now,
Suzanne xoxo

Wednesday, December 19, 2018

He's Making A List - Tina's Tree Ornaments

Hello Crafty Friends!
It's not too late to pull out your crafty stash and create a few Christmas ornaments. Have a look at Tina's snowy wonders.... they'll totally inspire you!!


Hello everyone, Christmas is almost here and I wanted to share some Christmas tree ornaments I made using the Wonderful December kit, He's Making A List.


I started  with a clear Christmas ball (the one that can be separated). I used 7 cm balls, I cut a circle from the paper in the kit for my background, I also cut the back of the ornaments firstly in thick white card three times and twice in white glitter cardstock.


Glue two of the white card pieces together, making sure the scallops match well, then add one of the glitter pieces and then the background.


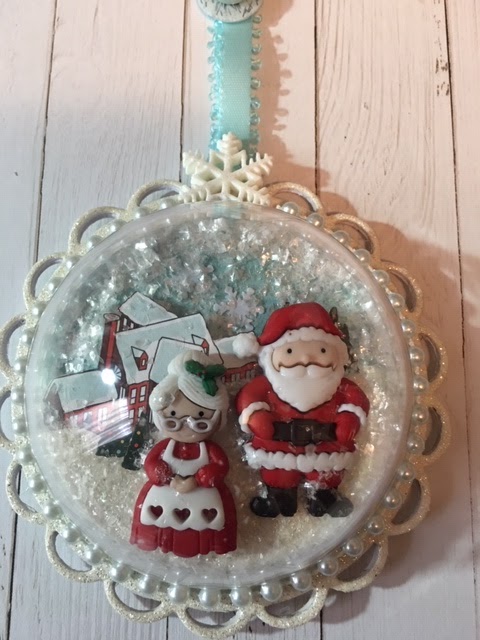
I made a snowy background using the white glitter cardstock. I also fussy cut some of the trees and the Santa's Manor. The little snowman and snowflakes are a gift from my lovely Secret Santa last year. The star pieces of these ornaments are the buttons from the kit which I glued down after removing the back piece so they would sit flat. (I also glued the two layered pieces from the reindeer and Mrs Clause just to make sure they did not separate),


Next I added some shimmery snow.


Add glue around the edge of the clear ball and hold down onto the background until it is stuck, I use Art Glitter Glue because it dries super quick. I added a pale blue string of beads around the edge.


I saw a really great idea on YouTube on how to balance the ornaments because the weight makes them hang off balance. To do this I glued four 10 cent coins on the lower half of the back of the ornament. Then I added some foam squares to even it out.


Now add glue to the third white scalloped card and add to the back holding it in place with bulldog clips until dry and then add the white glitter back, again I held in place with the clips until it was dry.


I finished the ornaments with ribbon from the kit and my own silver chain, some buttons, jingle bells and snowflake again from my secret Santa gift from last year.


I really love how they turned out.


I hope I have inspired you to make these Christmas Tree Ornaments.
Thank you and Happy Crafting.
Tina xxx
The December kit can be purchased HERE

Tuesday, December 18, 2018

The Stars are Brightly Shining - Donna's Shaker Cards

Hello Crafty Friends!
When I put the 'Stars Are Brightly Shining' kit together, I was really hoping that one of our CT girls would create a shaker card using the Nuvo Confetti. WELL! Donna went one better and created shaker ornaments for her Christmas tree. Perfect perfect PERFECT!!!! I just adore them!


Hi all,
I have for you today four shaker stars to hang from your Christmas tree..
I love this kit I received from Aunty Vera Scrap and Craft.
You could make these any shape you want..

Using the stencil with the Inka Gold, I stenciled a section of the paper to later cut out for a frame for the star ornament.. 


So this is how it works for a shaker card..
1. Die cut one large star from the gorgeous paper.
2. Die cut one large star from acetate.
3. Die cut one large star from cardstock for the back.
4. Die cut one frame from the large star and a smaller star.
5. Die cut the same as number 4. from fun foam.


Join the two stars together as show to cut a frame.. You can do this with any shape dies..


This is the fun foam which is cut the same as the frame of the card or in this case the star ornament for the tree.


Adhere the acetate to the large frame.


Adhere the fun foam on top of the acetate.


I used my finger to paint the wings of the angel with the glorious Inka Gold.


I attached a star from the ephemera pack and rubbed some Inka Gold on top and around it to shine..


The four bases of the stars.. I added ephemera pieces on all the bases of the stars.


Place the shaker pieces on the base of the star and using a strong adhesive, adhere the top onto the base. I attached ribbon between the gorgeous paper and the back cardstock piece.


I made the poinsettia flowers and added them to each star..


I love how this frame turned out with the stencil and Inka Gold.


Don't these look wonderful on the tree..


All four stars together..


I hope I have Inspired you to 
create glorious things..
Hugs
Donna xx

You can see my blog HERE
You can purchase the kit HERE 
Check out my Facebook page HERE
Related Posts Plugin for WordPress, Blogger...