
Hello Crafty Friends!
It's raining cats and dogs here today - which is great for the garden!!
And in Suzanne's Craft Room it's raining pretty garden-themed cards!
Enjoy......

The June kit is full to the brim with beautiful craft supplies from Aunty Vera Scrap and Craft and it was difficult to decide what I was going to do first. So after much thought, I decided to make 3 cards.
CARD 1
The first card is a shaker card (I'm nuts about shaker cards) and I went with the purple/mauve colour scheme as it features strongly in the beautiful Julie Nutting papers in the kit.
 |
| Purple/mauve cardstock and floral Julie Nutting paper |
 |
| dies taped together so that they don't move and cut about 10 times |
I glued the frames together and then cut the frame out in the purple cardstock twice for the front of the card and used glossy accents to stick a piece of acetate between them for the window.
 |
| sticking the acetate to the frame |
 |
| Cut for the back of the card |
 |
| flower pot, birdhouse, bicycle and bird on a branch added. |

After that I added the sequins and glued on the front window and let it dry before shaking it. Then I added one of the beautiful paper dolls from the Julie Nutting paper doll collection to the front of the shaker card.
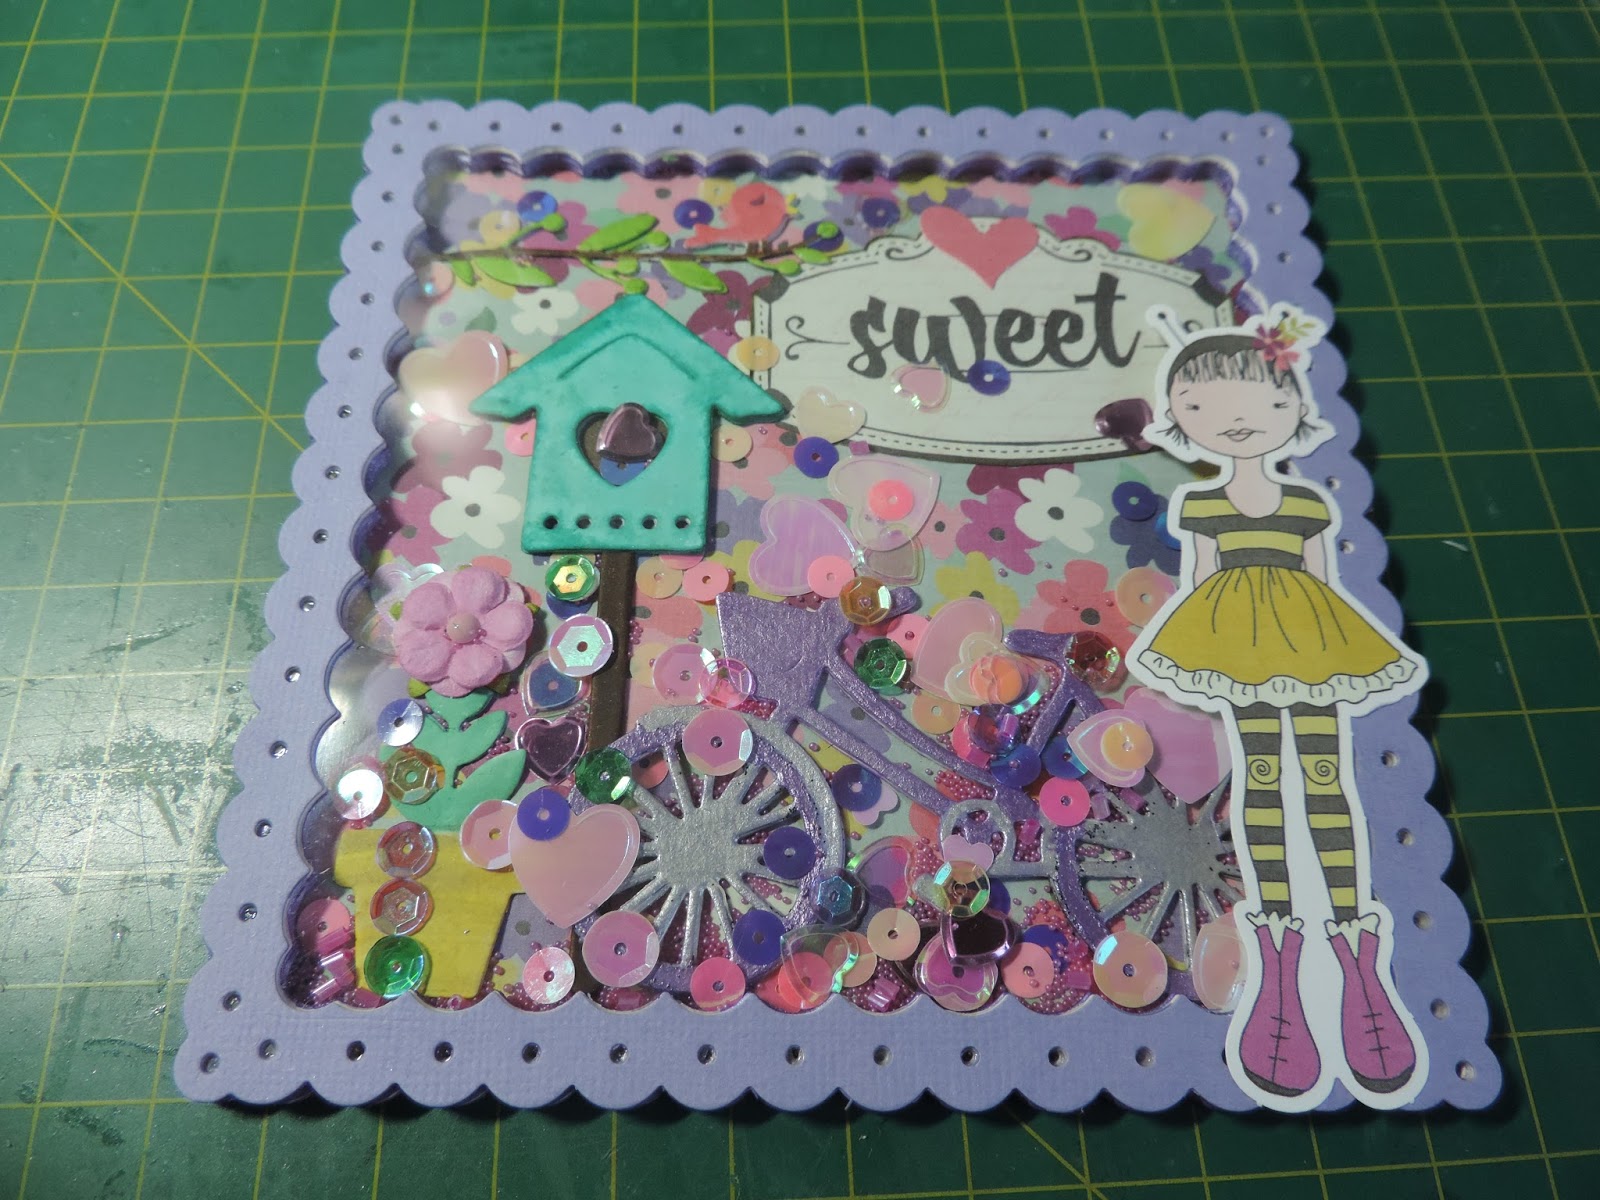 |
| sequins added and paper doll on front |
I then added a card base to the back of the shaker to make it into a card. Because it is so thick it would not fit into a standard envelope so I made an envelope box with my envelope punch board. You can see a video on how I did this below.
 |
| box envelope for the shaker card |
I fit the box together and then I used the beautiful rose stencil from the kit and used some texture paste to decorate the front of the box.
 |
| rose stencil from Kaisercraft |

I then added a small cutapart from the Julie Nutting papers
 |
| the finished box envelope |


 |
| side view of the box envelope |
CARD 2
Card number 2 is made with the same colour scheme. I have used one of the cut-aparts from the Julie Nutting papers and layered it on a pink paper from the collection. Behind that I used some of the lovely lace from the kit. and used foam tape on the back to give it some dimension and pop it up on the front of the card.
 |
| one of the cutaparts, layered on pink paper and backed with lace |
I then die cut a lattice piece and used some small flowers from my stash that match the colour scheme of the Julie Nutting papers and some leaves and glued them on the lattice and added this to the front of the card.
 |
| lattice die and flowers from my stash |
I put these elements onto a piece of the floral paper which I had layered on white cardstock. This was then layered onto a purple card base.
 |
| The finished card |
This card is also quite thick so I made a box envelope for this card as well.

I used another of the cut-aparts from the collection and I die cut a fancy frame from the floral paper for the front of the box envelope.
CARD 3
For the third card I used my favourite thing from the kit, the beautiful Penny Black stamp. She is just so beautiful and I decided I would colour her with my watercolour pencils which I am using for the first time. I stamped her out on watercolour paper.
 |
| Penny Black stamp. Isn't she lovely. |
 |
| Stamped out on watercolour paper and using my watercolour pencils. |
I then die cut this with my stitched square die and layered this on some pink cardstock. I used some foam tape to give this dimension before I added this to a layer of the floral paper. I also used some of the lace from the June kit on two sides of the card before adding a pink heart and a sentiment from the paper doll collection.
I used my blue and green pencils to give a very light wash to the background of the stamped image.
 |
| layered on floral paper and a pink card base. |
I then made a pink envelope for the card and added a cut-apart from the collection and a die cut to the front of the envelope
 |
| Envelope with sentiment from the Julie Nutting cut-apart page |
I had a wonderful time making these cards and I loved all the beautiful papers from Julie Nutting.
xx Suzanne
You can see the video on how I made these cards HERE.
You can see a video of how I made the envelope boxes HERE.
You can buy the June kit HERE.
Wow
ReplyDeleteThese are soooooo good
Love the colours
And the ideas
Thank you Jenni
DeleteMakes me wanna go make cards now. Wonderful Suzanne xxA
ReplyDeleteThank you Amira
Delete