Showing posts with label Simple Stories. Show all posts

Thursday, July 26, 2018

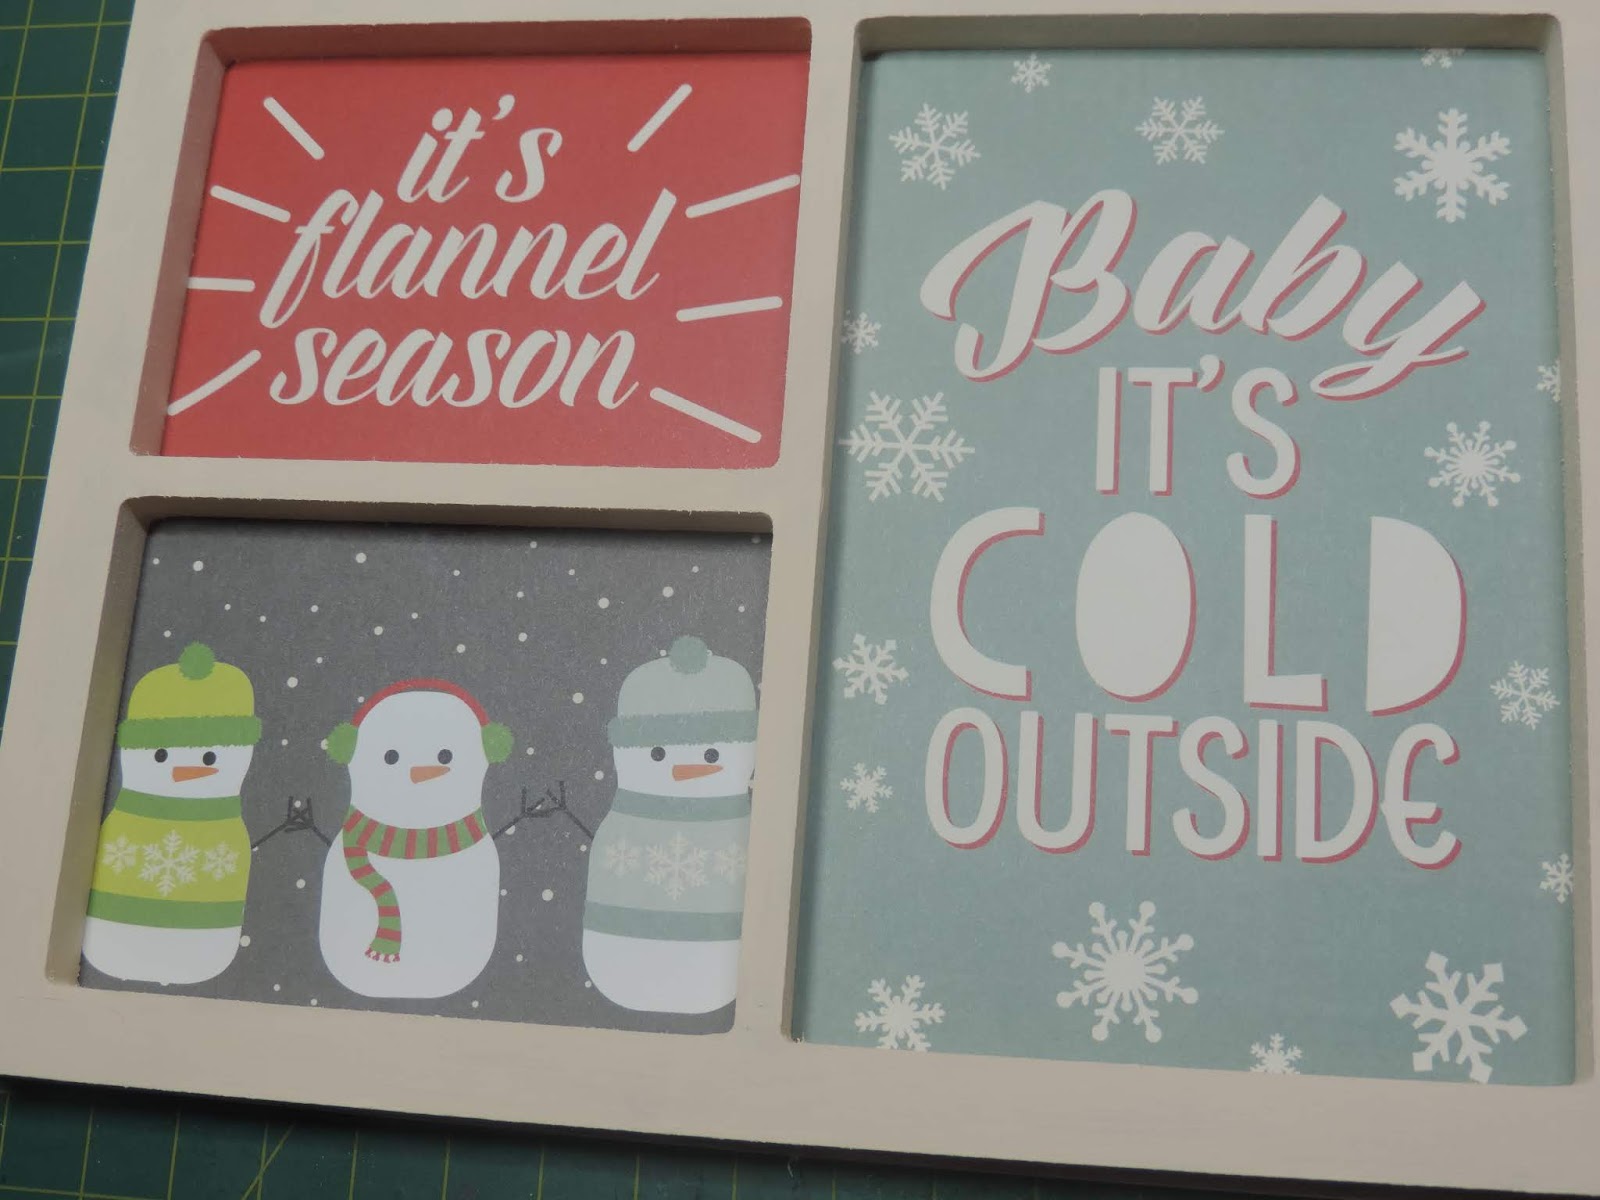
... and the Sky is Grey - Suzanne's Six Frame Photo Display

Hello Crafty Friends!
Do you find that sometimes scrapbooking papers are so adorable you just want to hang the papers on your wall? Well why not?!
Today Suzanne shows us a clever way to frame some of your favourite paper elements and create  a fun feature for your home.


This project was so quick and fun and would be so cute in a childs room.  I used a wooden six frame photo display from Kaisercraft that I picked up at Spotlight on clearance for a few dollars.  I painted it a cream colour.


The gorgeous papers from Simple Stories 'sub zero' has so many wonderful elements to choose from.  Below are the six that I chose to use.


I trimmed them all and glued them onto the back of the frame.


I used the Santoro ribbon from the kit to hang the frame


I glued the ribbon between the frame piece and the back


I added glitter to some of the frames to finish off this project


Thank you for having a look at my very simple project.

You can see a process video HERE.
You can purchase the kit here HERE.

See you next time
Suzanne XoXo


Wednesday, July 18, 2018

... and the Sky is Grey - Tina's Memory Keeping Cards

Hello Crafty Friends!
A card is a card is a card right?
Nope! Not when you use it in your memory keeping!
Join Tina today and create a set of cards that will be doubly special as they are designed to hold special memories....


Hello everyone. I hope you are enjoying this wonderful winter weather as much as I am.
Here in Victoria, we are currently enjoying school holidays and my husband and I are taking our two girls and two friends to the snow. I thought I would make a card for my youngest daughter and her friends which we will fill with photos from the trip as a keepsake for them.


The first thing the girls have been talking about is having a mega snowball fight, so I thought that it would make a perfect theme for a card.
The base of the cards I cut from a metallic cream cardstock at 8" x 4" and score at 4". I cut all my pieces from the papers from the kit. All the edges are inked with Vintage Photo Distress Ink.


Here is the finished card, a snowball fight with friends. I think my Bella is the little penguin.( I have added the Snowman's arms after taking this photo).


The second card is a Shaker card. Again, all the pieces are cut from the papers in the kit and I used a circle die to cut the Shaker window. As always, all my pieces are inked with Vintage Photo Distress Ink.
.

 I cut a piece of acetate and adhered it to the back of the striped piece. I used foam tape on the back and added my background piece before adding the sequence mix from the kit.


What's the go to drink to warm the kids up at the snow? Hot chocolate of course, and that is the theme of the third card. I just love the Snow Flake paper from the kit. I used this as my background, then layered the cut out of the Hot Cocoa piece. The 'Escape To The Mountains' banner I placed on foam tape and added some snowflakes from my collection.


The three cards are complete and are waiting for the photos from the trip to be added before I give them to the girls.


Thank you for joining me today and Happy Crafting.
Tina xxx

The July Kit can be purchased HERE

Friday, July 13, 2018

... and the Sky is Grey - Suzanne's Tag Mini Album {5 x 7}

Hello Crafty Friends!

What's even better than Winter? A mini album to store your favourite winter memories!!
Join Suzanne as she creates a gorgeous tag mini album.... be sure to watch her youtube video.... it will have you pulling out your craft supplies and wanting to make this album NOW!


Hello everyone.  I'm happy to announce that Winter has finally arrived in South east Queensland and I am loving it.  I love the few weeks of cooler weather that we get in Queensland because for most of the rest of the year it is scorching hot.  Something else that I love is the gorgeous July kit from Aunty Vera.

For this project I decided to make a cute little tag mini album and it is super quick and simple.  I used the horizontal elements page from the Simple Stories 'sub zero' collection and some cream cardstock for the inside pages.  I simply cut across the page leaving the two horizontal 4 x 6 cards together on the 4 inch side.  I folded them in half.


I cut some cream cardstock the same size and placed them alternately in the mini album


I made the cover and spine with some heavy cardstock.  The covers measure 5 x 7 inches and the corner has been taken off at 1 inch on each side to form the tag shape.  I made the spine 5 x 1 3/4 inches with a 3/8 inch spine.  I covered these pieces with the sub zero paper.


This shows the inside and outside of the cover of the mini album.


I sewed the pages onto the spine and then decorated the pages with some of the cut aparts and some die cuts.


Below are some of the pages in the album.


To finish off the mini album, I put in two eyelets and used some of the ribbon from the kit as a closure for this cute little album.


Thank you so much for having a look at my mini album.  I hope you are enjoying all the projects from the Team this month.

You can watch the process video HERE.
You can buy the kit from Aunty Vera HERE.

Bye for now and stay warm.
Suzanne xoxo


Friday, July 6, 2018

... and the Sky is Grey - Suzanne's Mixed Media Frame

Hello Crafty Friends!
I love winter! And I love the way Suzanne is celebrating the season with her beautiful mixed media frame! Isn't it just perfect?... saying the cold is here and I'm loving it!!


Hello everyone.  I hope you are all well and keeping warm and cosy in the cooler weather.

This month the July kit (...and the Sky is Grey)  is all about Winter and getting warm and cosy.  The beautiful papers from Simple Stories are called 'Sub Zero' and have some beautiful colours (greys and greens and creams) which are perfect for a winter mixed media project.  I have used one of the 4 x 6 horizontal elements, some of the small elements from the Just Chillin' page and the whole sheet of the Vertical Elements page (the B side) which is grey with cream snowflakes.  I die cut an assortment of leaves and greenery to add to the project.  I also used some shutters from Prima as the focal point with the sentiment from the Horizontal Elements.

I used a frame which I picked up at the second hand store.  It was meant for a round embroidery but I have used it for my mixed media project.  It was quite old and had some age marks on the cream mat board so I painted this with some cream paint to cover these marks.


I used the vetrtical elements page (B side) to cover the round area and painted the inner frame with some white paint that I had mixed with the Nuvo Shimmer Powder (Atlantis Burst) which is also in the July kit.


I made some flowers and coloured them with the Nuvo Shimmer Powder as well.


Here you can see one of the small elements from the Just Chillin' page and some of the greenery that I die cut from coordinating cardstock.


Here is the sentiment from the Horizontal Elements which I placed in the window frame and two small elements from the Just chillin' page that I placed on the shutters.


I added some ink from the Unicorn ink pad that come with the Hero Arts Ink cube (Winter) set (also in the July kit) so that it looked like snow on the tips of the leaves and other greenery.


Also from the July kit are some Prima Metal Trinkets (flowers and vines) and I used one of the metal flowers in the project.  I did change the colour of this piece using the Nuvo Shimmer Powder


I added some cheese cloth and my handmade flower to the project.  I coloured the cheesecloth with the Nuvo Shimmer Powder


This piece was coloured with citrus twist distress oxide ink


I used some of the sequins from the July Kit to add a bit of sparkle to the project.


I die cut some small snowflakes in a grey cardstock that matched the grey in the Simple Stories paper and gave them some shimmer with a wink of stella pen.  I also added a sequin to the middle of the largest snowflakes and some sequin snowflakes throughout the project.

This is the finished project. 


Thank you for having a look at my project.  I hope you enjoyed it.

Bye for now
Suzanne XOXO

You can get the July kit HERE.
You can watch the video of how I put this project together HERE.
You can watch the unboxing of the July kit HERE.

Related Posts Plugin for WordPress, Blogger...