
Are you ready for our first August project?
When Goldilocks went walking in the woods she found 3 bears.
When Suzanne went walking into her craft room.... she made 3 cards!
Well, I tried... haha
Enjoy!

The August kit from Aunty Vera Scrap and Craft is just delightful. With the beautiful papers from BoBunny (Weekend adventures collection), that gorgeous house mouse stamp, Prima flowers, Cottage Cutz bear die, it just goes on and on. I was in crafty heaven with this lot. As always, I decided I just had to make a few cards from the kit. I hope you enjoy them.
Card 1.
The first card I made is a side stepper card made from kraft cardstock. To make this card I used a piece of card stock that measures 5 1/2 x 8 1/2 inches. With the cardstock in portrait orientation you have to measure 2 1/2 inches across the page and 2 1/8 inch down the page and mark this spot. Then measure down the page to the 7 5/8 mark. Cut between these two points. Turn the cardstock 90 deg anti clockwise and score at 2 1/8 inches to the cut line4 1/4 inches the whole way across the card stock
5 1/2 inches to the cut line
6 3/4 to the cut line
7 5/8 to the cut line
 |
| 5 1/2 x 8 1/2 inch kraft card stock Score at above measurements Fold in mountain and valley folds to get the right shape |
 |
| folded card |
 |
| the paper I used for the card |
 |
| Cut the paper to cover the front of the card |
 |
| all front facing card stock covered with the paper leaving a small border around the outside I then die cut the bear, sign and grass and coloured them all with distress ink
 |
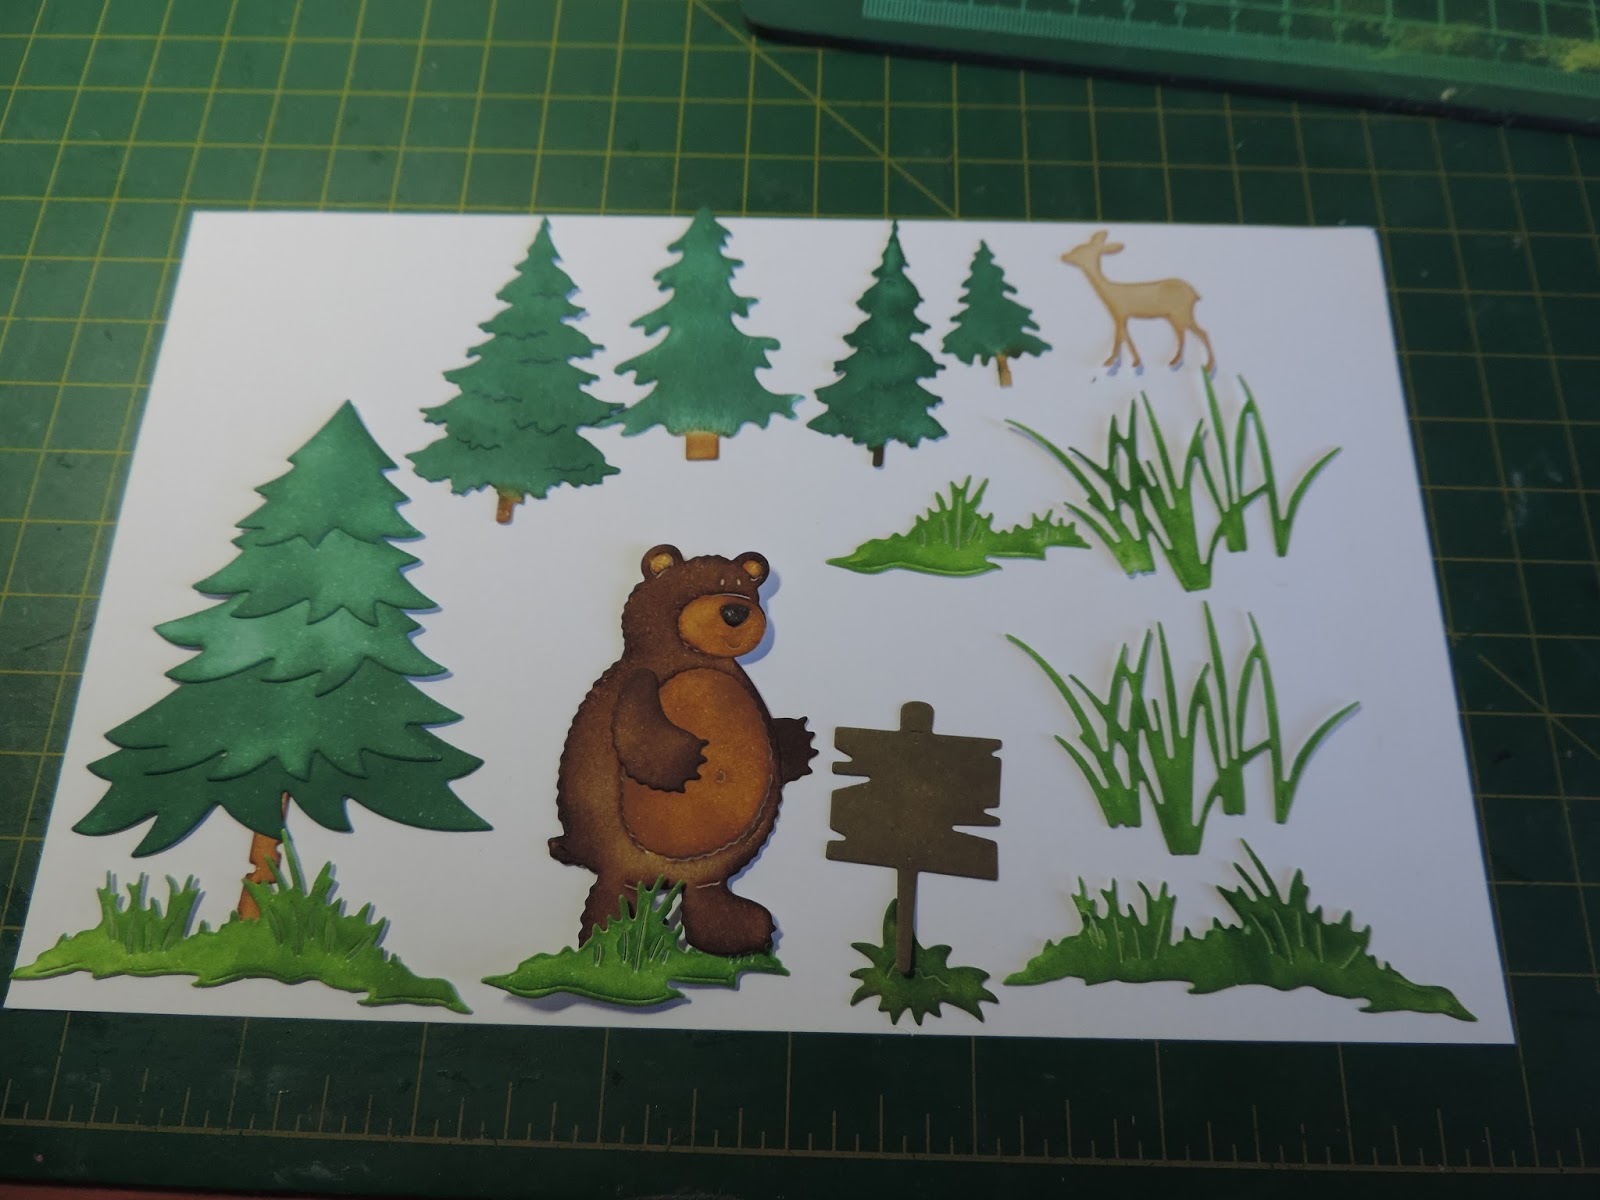 |
| the die cut pieces for the card - (not all get used) |
 |
| I cut the fox from the cut apart page |
Here you can see the dear, tree and bear have been added to the front of the card. The tree has been added with 1 layer of foam tape and the bear with 2 layers of foam tape to give some dimension, The grass has also been added with foam tape.
 |
| I have added a small deer, a tree, the bear and some grass to the front of the card |
 |
| the three layers of the stepper card |
 |
| side view of the card |
 |
| paper for the back of the card |
Two pictures of the finished card
 |
| the finished card |
 |
| the finished card |
Card 2
The second card features the Stampendous House Mouse stamp which I absolutely adore. It is just so sweet. I stamped it onto some smooth white cardstock with black Memento ink and coloured it with prisma colour pencils using many shades of brown. |
| stamped with black memento ink onto smooth white card stock |
 |
| coloured using many shades of brown |
 |
| Finished the colouring and added that to some kraft card stock |
 |
| I added foam tape to this front panel before adding it to the card front |
For the card base I chose the pretty yellow paper from the collection and a sentiment for the card. It matches the picture perfectly as it says 'good friends and great food'.
 |
| Yellow paper and a sentiment for the card front |
 |
| layered on kraft card base |
 |
| layered on kraft card stock |
The sentiment has two layers of foam tape under it so that it pops up from the front of the card.
I also added a little yellow bow made from the pretty ribbon which is also in this months kit.
 |
| the finished card |
Card 3
For the third card I used the Jolee's boutique dimensional bear stickers and the Ken Oliver color burst powder from the kit. I used a piece of watercolour paper and wet the paper quite well with a spray bottle. I then coloured the bottom portion of the card with Chartreuse Colour Burst (not in the kit) and the top with the Cerulean Blue colour burst from the kit
 |
| bottom portion coloured with Chartreuse Color Burst |
 |
| top portion coloured with the Cerulean Blue colour Burst from the August kit |
 |
| cut out the portion of the coloured paper that I wanted for the card front |
 |
| the Jolee's boutique dimensional stickers from the August kit. |
 |
| grass for the card front |
I then layered grass, tree and bears on the card front using foam tape to give some dimension.
 |
| layered bears, grass and tree |
I added a sentiment from the weekend adventures collection on top of some of the leftover coloured watercolour paper.
 |
| Added the 'Play more, worry less' caption from the BoBunny collection |
 |
| Added card front to white card stock, green paper from collection and white card base |

I really had a wonderful time making these cards as the selection of goodies from the kit just made it so incredibly easy. Thank you for having a look at my cards.
You can see the video on how I made these cards HERE.
You can get the kit from Aunty Vera Scrap and Craft HERE.
xx Suzanne xx
These are totally gorgeous. Cannot tell you my favourite as I love them all. Xx
ReplyDeleteThank you Donna.
Delete