Today we have a fabulous project from Donna..... a Christmas gift bag using our December Kit!
Hi all, well I cannot believe Christmas time is here already..
What happened to the rest of the year?
Firstly I would like to say a huge Thank You to Aunty Vera for staying with me with all the hassles and muck-ups (is that a word?) I have had through this year and for being such an understanding person when I deserted ship to go travelling..
I do appreciate it and Thank You also to the wonderful team for
picking up the slack I left behind and
A Gigantic Thank You to YOU the members, for helping the creative team
challenge themselves to become better crafters...
Now on to my project with this gorgeous December Kit..
Magical Christmas Bag..
Cut the base at 2 1/2inches x 5 1/4 inches and score 1/2inch on all four sides
Cut up to the score line as shown and place a little double sided tape on each corner.
( I cut a bit off the corners as shown to make it easier to fold).
Cut two handles at 12inches x 3/4inch and two pieces of this glorious paper
at 12inches x 1/2inch.
( I ink all the edges of the designer paper, though not the white)
A Hint: Using a bone folder/scorer/ruler, gently but firmly pull it along the paper as shown to break the fibres. It helps the paper to curl.
Cut the bag at 12inches x 5inches and again break the fibres by using your hand or ruler to bend the paper. Place a strip of double sided tape on the inside bottom of the bag. (I really did not want to cut this paper sighh)
Cut two pieces of contrasting paper at 12inches x 1/2inch and adhere to the top and bottom of the bag.
Peel off the adhesive on the inside and wrap it around the base as shown.
Because of the fibres breaking, it is quite easy to put together.
It should look like this..
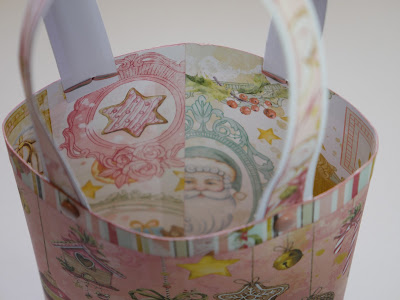
Attach the handles with brads on the inside of the bag..
Cut another strip of contrasting paper at 12inches and 3/4inches and adhere on the inside of the bag covering the prongs of the brads..
Don't forget to ink ALL the edges of the designer paper.. I used Victorian Velvet Distress Ink, it is perfect with this paper..
Poinsettia die from Doohickey.. Season's Greetings from the kit.
I painted some Glimmer mist on the stars and bells..
I also added some 'snow' around the edges and a little over the bag..
I love the paper so much I only wanted minimal embellishments..
The bag finished..
The back of the bag. I fussy cut two tags and the bow from the paper in the kit and using foam tape adhered as shown..
I didn't like the white handles on the inside being bare so I cut up some scraps into strips and adhered them to the handles.
My apologies for poor quality of photos but I do not have the full use of my studio as my daughter has all her furniture in there and I can only use my desk which is now chockers full of things I could reach lol..
...............................................
BUY Aunty Vera's Monthly Kits HERE
December Monthly kit is available for $54.85 which is a saving of 20% on buying the items separately.
Postage is $9.00 to anywhere in Aus.
For internationals, please email for accurate prices.
C O N T A C T:
info@auntyverascrapandcraft.com.au
................................
Please visit me on my blog HERE and don't forget to say hi!!
or
on my FB page HERE
................................
Please visit me on my blog HERE and don't forget to say hi!!
or
on my FB page HERE
I hope I have inspired you to create Glorious things..
Thank you for stopping by..
Hugs
DONNA xx


No comments:
Post a Comment