Wow the days are flying by! It's only a week till Christmas so get ready for a whole lot of Christmas craft!! And hopefully you'll have some time to join in the crafty fun!
Today Suzanne creates a brilliant explosion box with the sweetest surprise in the centre....
Well, what an amazing year it has been. I have had a wonderful time being a part of the talented and beautiful creative team for Aunty Vera. The December kit is beautiful and just a pleasure to craft with.
The project that I am doing for December is a large explosion box that measures 6 x 6 inches and inside that it has another box at 5 x 5 inches and then inside that a special little surprise. I hope you enjoy having a look at this project.
This beautiful BoBunny paper forms the basis of these boxes. For each box I have used 3 pieces of 12 x 12 cardstock for the box bases and then another 3 pieces of cream cardstock for the layers of the cover panels.
The 12 x 12 cardstock is cut into 2 pieces of 12 x 6 cardstock and scored at 6 inches for the 6 x 6 box.
For the 5 x 5 inch box, the cardstock needs to be cut at 5 x 10 inches and scored at 5 inches and you need 4 of these.
You will need 4 pieces of this
These four pieces are glued together on the base so that the base is four layers thick.
The lid uses the other piece of 12 x 12 cardstock.
This is the instructions for the lid of the 6 x 6 box. For a 6 x 6 inch box you need to measure a piece of cardstock at 8 1/8 inches square and score at 1 inch all the way around. This works for any size box. For the 5 inch box, I measure a lid that was 7 1/8 inch square and scored at 1 inch to form the sides of the lid. The 1/8 of an inch is added on because there have been 8 more layers of paper and cardstock added to the outside of the box and this 1/8 inch gives enough room for the lid to fix snugly.
For each cover panel of the box, I cut a piece of cream cardstock at 5 7/8 inch (9 of them) 4 for the outside panels and 5 for the inside panel including the inside base of the box. You also need to cut one for the lid. This will measure 6 x 6 because the lid is a little bigger than the side panels.
For the 5 x 5 inch box, just adjust your measurement accordingly.
Because the cream cardstock panel is 1/8 inch smaller than the box sides, you are left with a small border all around the panel.
I then cut the paper I wanted to use at 5 6/8 inch square
I used the carousel horse
and the deer images from the gorgeous paper
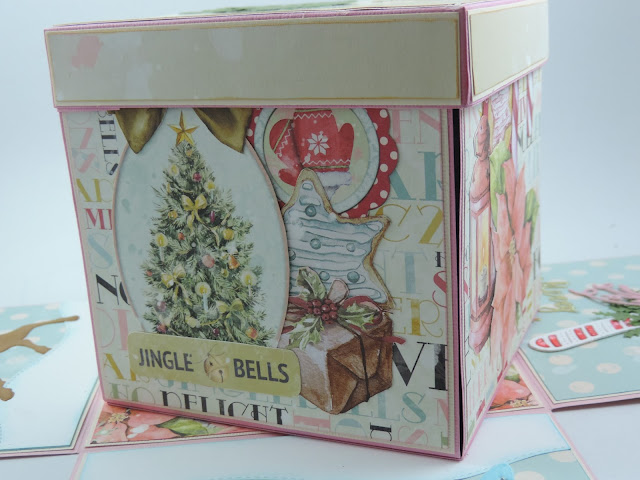
and two of the 4 x 6 cut-a-parts for the outside of the box
I chose the blue with cream polka dots paper for the inside panels
The outside panels
The inside panels
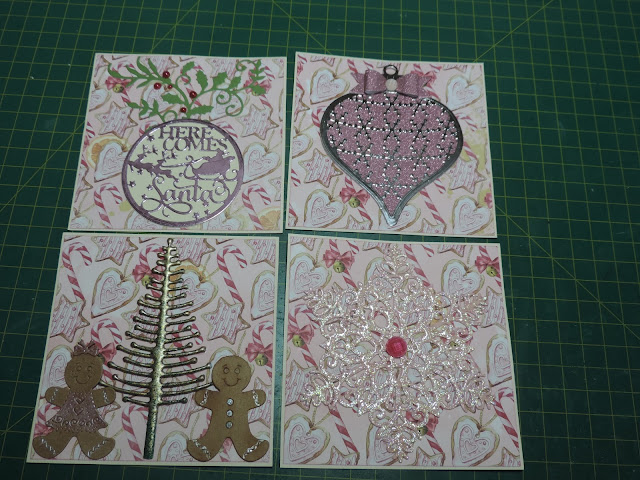
For the inside panels, I used some of my dies to decorate.
For the lid I made a large rosette which I have glittered up and added a store bought decoration.
5 x 5 inch box
This is the lid of the inside 5 x 5 inch box. I have used the lovely stampingbella stamp and then used some diecuts to form the top of the tree. I also used the wink of stella pen to add sparkle to the lid. Unfortunately, my pictures don't do it justice. It looks really pretty. I also add panels to the side of the lid to give it strength. Just use measurements 1/8 of an inch smaller than the piece that needs to be covered.The outside panels for the 5 x 5 inch box have been covered with one of the beautiful papers and then I used the cut-a-parts page to do a collage of the elements.
For the inside panels of the 5 x 5 inch box I used some more of my dies to decorate.
Inside the 5 x 5 inch box, I decorated a cloche with one of the gorgeous trees that were in the December kit and then used a santa rubber and some Christmas buttons to make a cute little Christmas scene.
Here are the pictures of the finished box.
Here you can see that I used some of the lucky dip wood elements that were in the December kit.
You can watch a video of me putting this explosion box together HERE.
You can get the kit from Aunty Vera HERE.
Thank you for joining me today
xx Suzanne xx


No comments:
Post a Comment