
Hello Crafty Friends!
I love that there are so many ways that you can create mini albums and books! Today's tutorial from Gina uses just a single sheet of 12x12 cardstock to create a gorgeous mini album with flaps for so many photos and special memories. So no excusese... start creating!!! It's a great weekend project ;)

Hi everyone. So excited to be back again this month and what a wonderful collection I have to create with :) For my first project, I'm making a mini album from one sheet of 12x12 paper as a father's day gift for my husband.
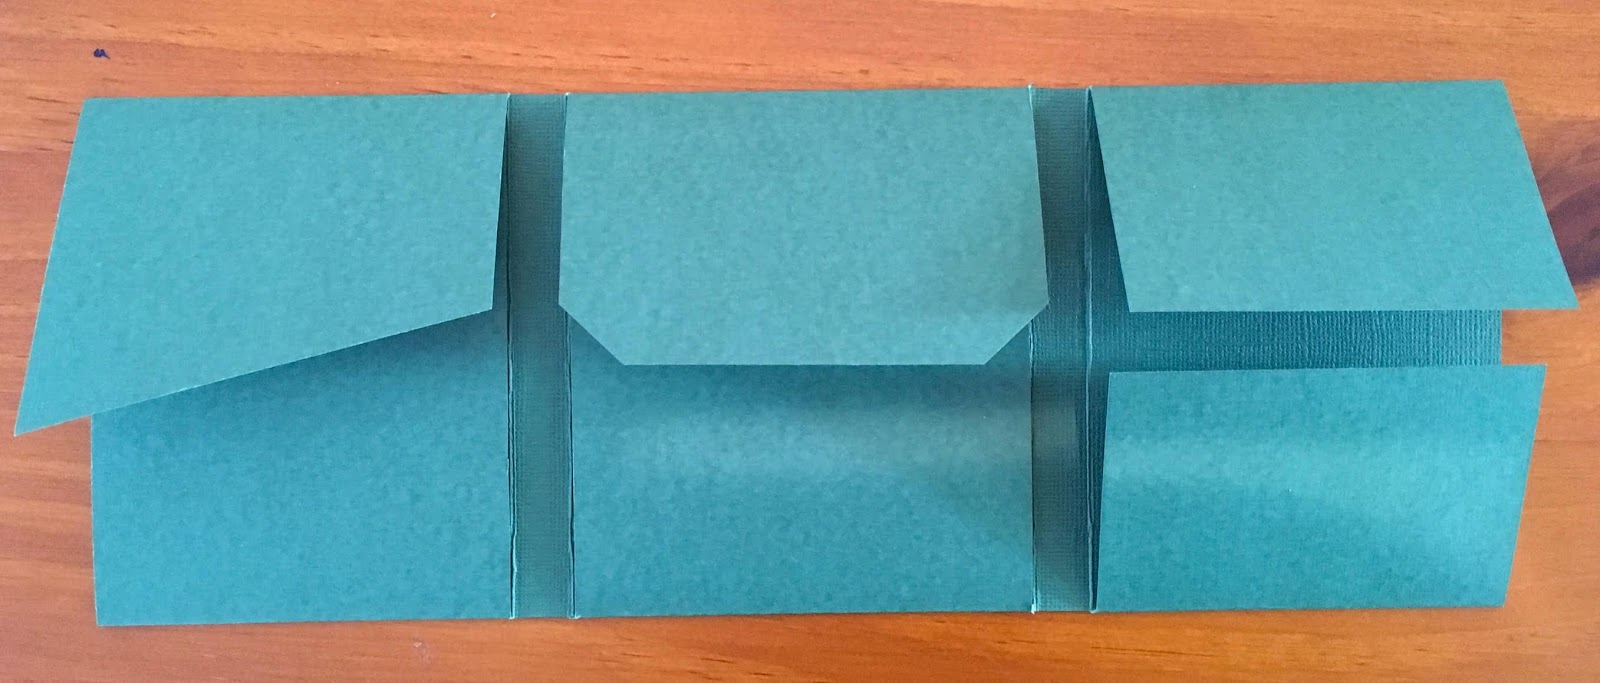
I started with the green cardstock from my evil enabling box. I scored it at 3.5", 4", 8" and 8.5". I've shown this to you on a lighter sheet so you can see what I've done.

Turn it 90 degrees and score at 3" and 7.5".

Next cut the areas marked with an x, fold and burnish.

This is what you should end up with. I've cut a small portion off on all the sides that fold in to make the fold more smooth.

Now for the flaps. The first flap, I marked an inch from the bottom on the right and cut it at an angle. I cut the second flap down to 2 1/2" and marked 1/2'' from the bottom corners and cut them out. The third flap, I decided to make a gate fold so I cut both halves to 2 1/4".

This is what it looks like once it is folded.

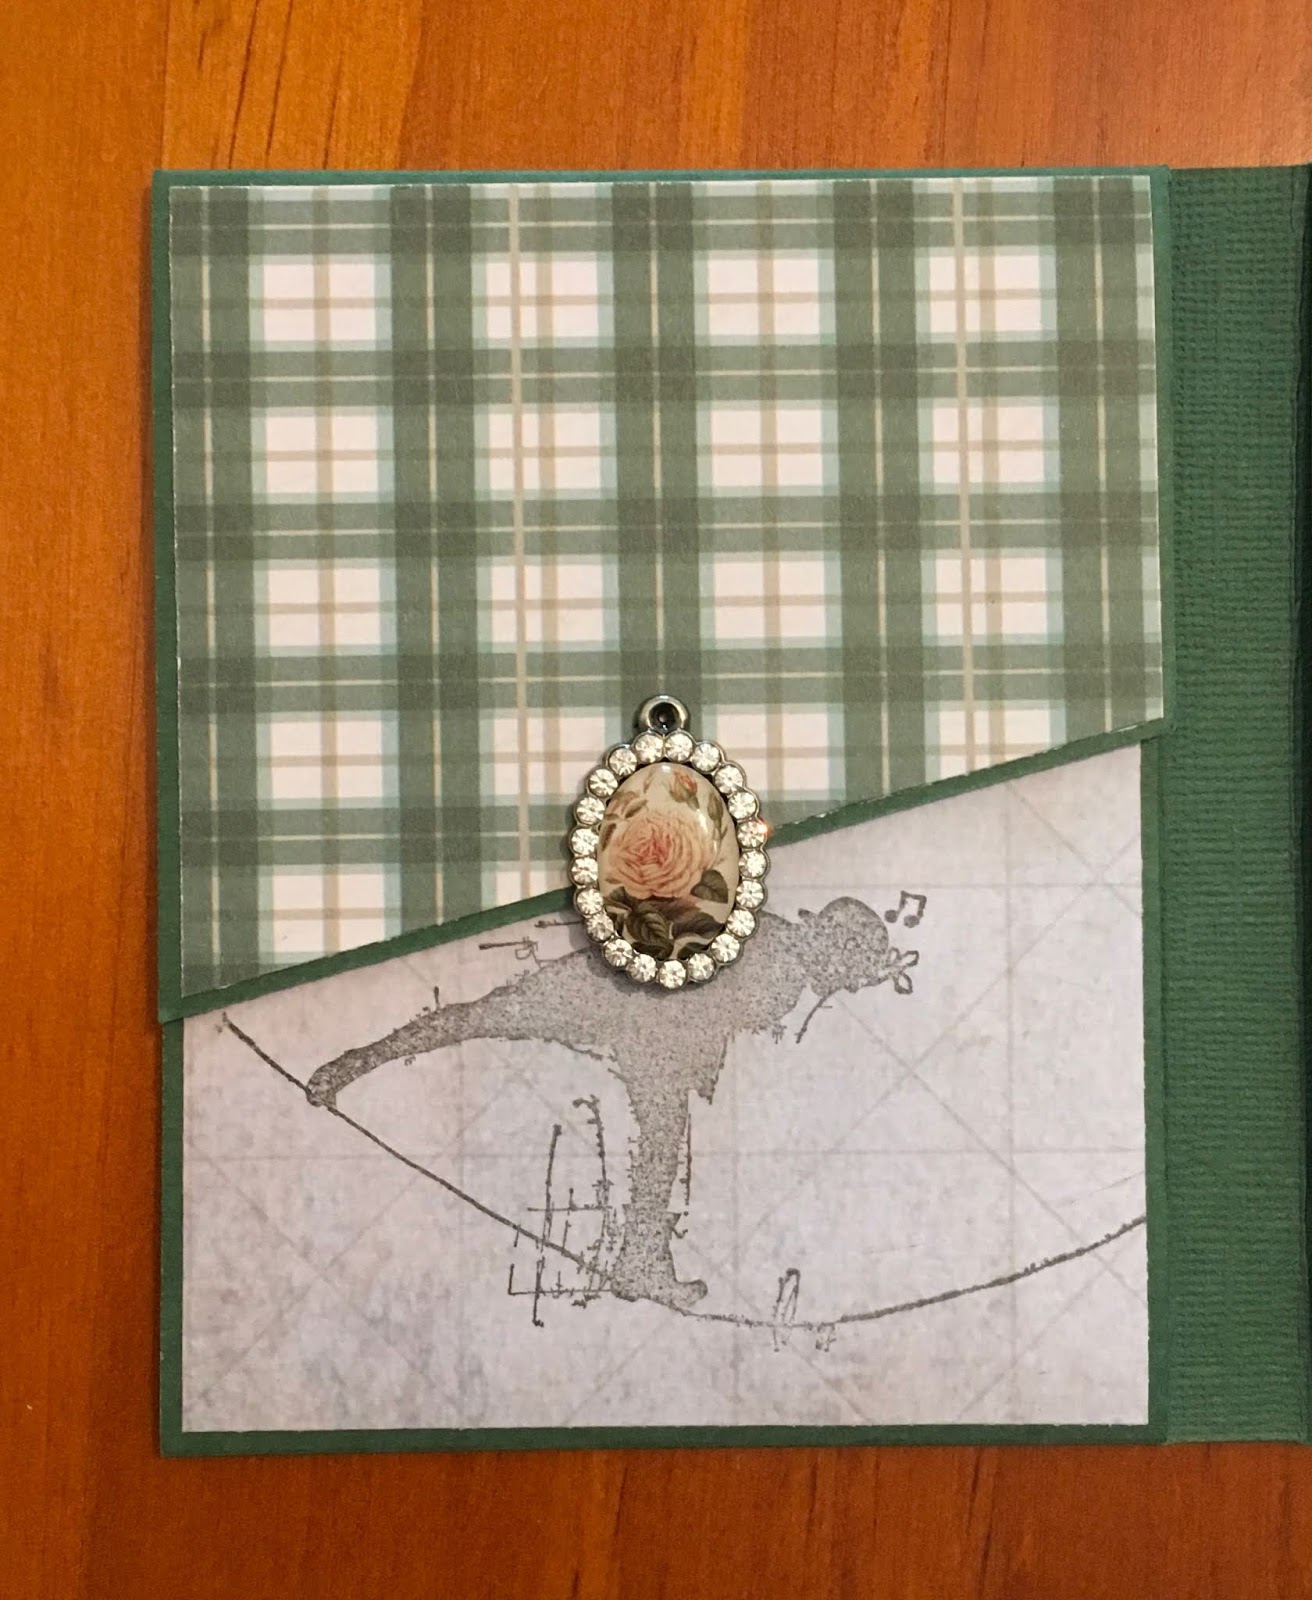
I used the Gentleman's Emporium 08 paper which I cut down to size on the cover. I then used one of the cut aparts from the Gentleman's Emporium 10 paper on the bottom left corner. I've raised it with a piece of chipboard and stuck a picture of my husband and my first daughter on it. I love the "Best Friend" as she was daddy's girl right from the time she was born.

I've used another piece of the Gentleman's Emporium 08 paper on the other flap. I stamped the image of the man with the balloon on the paper, first with Tim Holtz Tea Dye distress ink and then again with black ink. I stamped one of the quotes from the Tim Holtz theories stamp set on one of the off-cuts, cut them apart and them stuck them on after inking the edges with Tim Holtz Vintage Photo Distress Ink.

I've covered the flaps with the Gentleman's emporium 08 paper.


On the first flap, I have used one of the Tim Holtz Idea-ology jeweled charms. I chose the rose as I loves the contrast but my husbands first comment when he saw it was girly hahaha.


I love that there are so many ways that you can create mini albums and books! Today's tutorial from Gina uses just a single sheet of 12x12 cardstock to create a gorgeous mini album with flaps for so many photos and special memories. So no excusese... start creating!!! It's a great weekend project ;)
Hi everyone. So excited to be back again this month and what a wonderful collection I have to create with :) For my first project, I'm making a mini album from one sheet of 12x12 paper as a father's day gift for my husband.
I started with the green cardstock from my evil enabling box. I scored it at 3.5", 4", 8" and 8.5". I've shown this to you on a lighter sheet so you can see what I've done.

Turn it 90 degrees and score at 3" and 7.5".

Next cut the areas marked with an x, fold and burnish.

This is what you should end up with. I've cut a small portion off on all the sides that fold in to make the fold more smooth.

Now for the flaps. The first flap, I marked an inch from the bottom on the right and cut it at an angle. I cut the second flap down to 2 1/2" and marked 1/2'' from the bottom corners and cut them out. The third flap, I decided to make a gate fold so I cut both halves to 2 1/4".
This is what it looks like once it is folded.

I used the Gentleman's Emporium 08 paper which I cut down to size on the cover. I then used one of the cut aparts from the Gentleman's Emporium 10 paper on the bottom left corner. I've raised it with a piece of chipboard and stuck a picture of my husband and my first daughter on it. I love the "Best Friend" as she was daddy's girl right from the time she was born.

I've used another piece of the Gentleman's Emporium 08 paper on the other flap. I stamped the image of the man with the balloon on the paper, first with Tim Holtz Tea Dye distress ink and then again with black ink. I stamped one of the quotes from the Tim Holtz theories stamp set on one of the off-cuts, cut them apart and them stuck them on after inking the edges with Tim Holtz Vintage Photo Distress Ink.

I've covered the flaps with the Gentleman's emporium 08 paper.

I then covered the inside of all the flaps and the base with the Gentleman's Emporium 03 and 02 papers.

On the first flap, I have used one of the Tim Holtz Idea-ology jeweled charms. I chose the rose as I loves the contrast but my husbands first comment when he saw it was girly hahaha.
On the inside, I've stamped the image of the man jumping and the "leap and the net will appear" quote from the Tim Holtz theories stamp set.

On the base, I have stuck a picture of our second daughter's Baptism and on the inside of the flap, I have stuck another cut apart from the Gentleman's Emporium 10 paper to make a pocket for his gift card.

The middle flap has a circle that was left over when I was cutting out the clock frame using the Graphic 45 Square Tag and Clock Die Set. The clock frame makes a beautiful picture frame as you will soon see. I've used another cut apart from the Gentleman's Emporium 10 paper on which I stuck a picture of us. I then stuck the frame on the circle. I've used the Tim Holtz Idea-ology large hinge clip to hold it closed.

On the other flap is a picture of my husband and daughters with that lovely Graphic 45 clock die frame as a picture frame.

Inside I have two more pictures and another cut apart from the Gentleman's Emporium 10 sheet which I raised on chipboard and stuck in the corner of the centre photo.

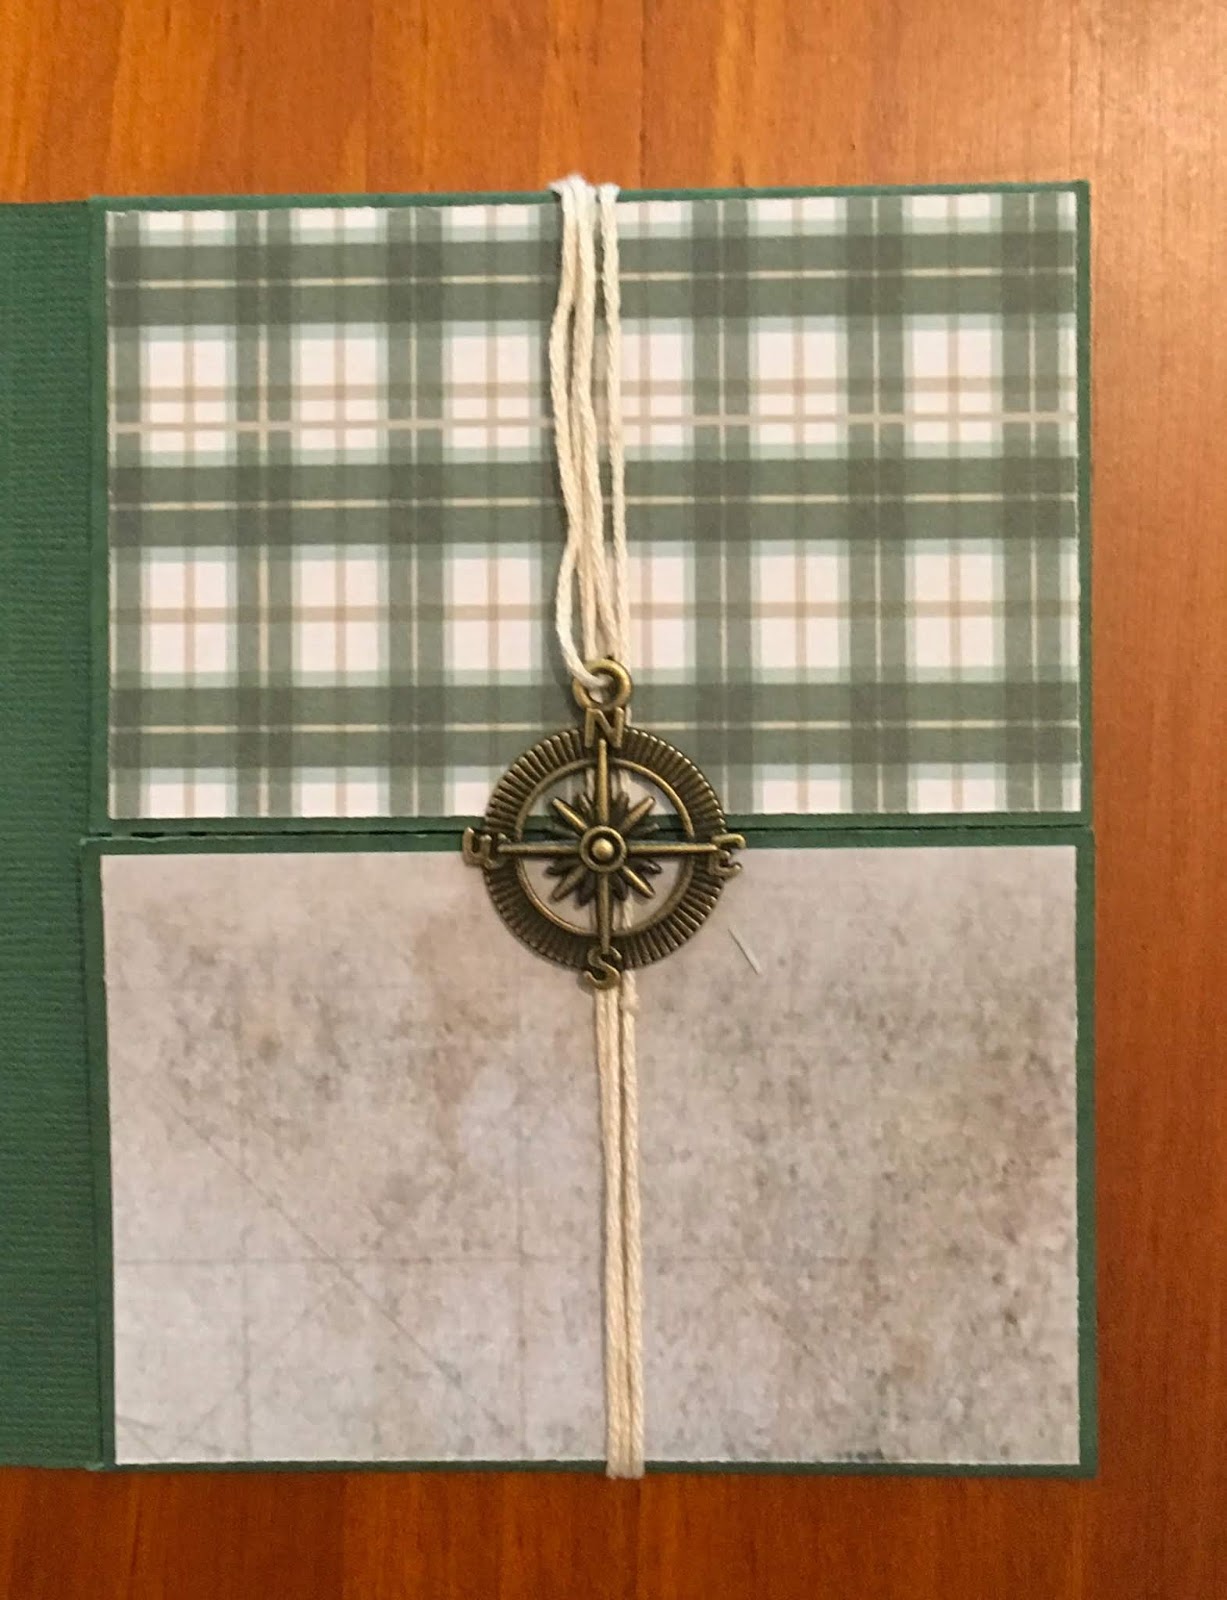
The gate-fold flaps, I have tied closed with a piece of string at the end of which I have tied the compass charm from the Ken Oliver vintage compass and mini arrows set.
Inside I have some more photos and another quote from the Tim Hotz theories stamp set which I stamped on an off-cut, cut out and inked the edges with my Kaisercraft Forest ink.

Here's another picture with all the flaps open.

Hope you enjoyed this tutorial and would love to see your mini albums if you decide to make one.
Till next week, stay awesome!
Gina xx
This album is so cute Gina. xxx
ReplyDeleteLove this Gina and another project on my list to do.. xxx
ReplyDeleteSo wonderful Gina 🥰🥰🥰
ReplyDelete