
Hello Crafty Friends!
Remember Gina's awesome Happy Mail Folder from last week?
Well today Gina fills it with all sorts of crafty goodies.... so much fun!!

Hey everyone - I hope today has been a good day so far for you :) Today I am going to show you some of the embellishments and inserts I made to go into the happy mail folder we made.
First I'm going to make a few tissue flowers. I have cut out some tissue paper with a 1" scallop punch, I think about 14 pieces in total. I find it easier to punch if I put a piece of paper around it. I've poked a hole through the center with my awl.

I've then put one of the Echo park brads in the center and then scrunched up the pieces one by one to make the flower. I've used the red, yellow and blue brads.

I've put them on the corner of the magnetic sheet. Since the brads are metal I don't have to glue them and whoever receives them can take out the flowers and use them for other projects.

You can also add paper clips, dies or any other metal elements by just letting them stick to the magnet.
I stuck the "Hello there" die cut from the ephemera pack in the centre of the bottom pocket and put the "I will drink coffee..." die cut tag in one of the pockets.

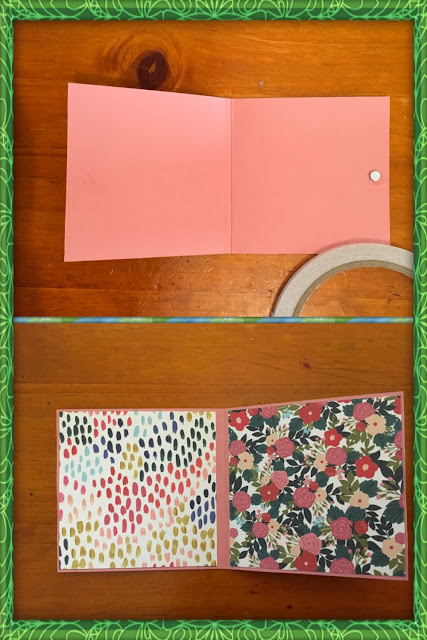
Next I made a little booklet to put some ephemera in. I started with a 6 3/8"x 3 1/8" piece of the dark teal and pink cardstock. I've scored the 6 3/8" side at 3 1/8" and 3 1/4" and folded it.

I chose 4 of the 3x3 journaling cards from the 3x3 journaling card sheet to go on the outside and the inside.

I've added the hello brad in the middle of the right side of the card thats going on the front cover and stuck it onto the front cover

I've stuck a magnet on the inside on the right page directly under the brad and stuck the two 3x3 pieces that I've chosen for the inside, so when you close the booklet the magnet and the brad hold it closed.
I've stuck the last piece of the 3x3 cards on the back. Then I've chosen 2 of the die cuts from the ephemera pack and put glue on the edges marked with crosses to make bands we can slip the ephemera into.

I've also added the smile sticker to the front and the roses sticker at the back, along with a little takeaway coffee cup die cut made using the Sizzix thinlits die.

I die cut one of the 6x6 patterned papers using the sizzix thinlits die.


Remember Gina's awesome Happy Mail Folder from last week?
Well today Gina fills it with all sorts of crafty goodies.... so much fun!!
Hey everyone - I hope today has been a good day so far for you :) Today I am going to show you some of the embellishments and inserts I made to go into the happy mail folder we made.
First I'm going to make a few tissue flowers. I have cut out some tissue paper with a 1" scallop punch, I think about 14 pieces in total. I find it easier to punch if I put a piece of paper around it. I've poked a hole through the center with my awl.

I've then put one of the Echo park brads in the center and then scrunched up the pieces one by one to make the flower. I've used the red, yellow and blue brads.

I've put them on the corner of the magnetic sheet. Since the brads are metal I don't have to glue them and whoever receives them can take out the flowers and use them for other projects.

You can also add paper clips, dies or any other metal elements by just letting them stick to the magnet.
I stuck the "Hello there" die cut from the ephemera pack in the centre of the bottom pocket and put the "I will drink coffee..." die cut tag in one of the pockets.

Next I made a little booklet to put some ephemera in. I started with a 6 3/8"x 3 1/8" piece of the dark teal and pink cardstock. I've scored the 6 3/8" side at 3 1/8" and 3 1/4" and folded it.

I chose 4 of the 3x3 journaling cards from the 3x3 journaling card sheet to go on the outside and the inside.

I've added the hello brad in the middle of the right side of the card thats going on the front cover and stuck it onto the front cover

I've stuck a magnet on the inside on the right page directly under the brad and stuck the two 3x3 pieces that I've chosen for the inside, so when you close the booklet the magnet and the brad hold it closed.

I've stuck the last piece of the 3x3 cards on the back. Then I've chosen 2 of the die cuts from the ephemera pack and put glue on the edges marked with crosses to make bands we can slip the ephemera into.

I've also added the smile sticker to the front and the roses sticker at the back, along with a little takeaway coffee cup die cut made using the Sizzix thinlits die.

I die cut one of the 6x6 patterned papers using the sizzix thinlits die.

I also did the same for the "cappuccino cups" paper and used the coffee beans side of the paper, stamped the takeaway coffee cup stamp that comes with the Sizzix dies and stuck the little strip that goes on the cover using the cappuccino cups side. I've stamped the "I break for coffee" stamp that comes with the same kit on the label and stuck that on.

I put a paper clip on the patterned cup with the longer side on the pink part and glued the coffee bean cup onto the pink side to make my takeaway coffee paper clip.

That slides onto the second pocket.

I punched a 1" circle through one of the 6x6 pages with the squares and stuck that onto a bottle cap and put a plastic cabochon on it. That can be attached to the magnet as well.

Finally I made another little booklet. For this one I used a strip of the 3x4 journaling cards paper. I've scored it at the edge of each card and made a w shape as shown.

Next put glue on the bottom and the open side of the middle 2 pages, on the patterned side to make a pocket that opens from the top.

Stick a piece of ribbon to go around the front and back of the book. The length I've used is approximately 15 inches.

I've then cut 2 more pieces of the 3x4 journaling cards to make the cover and the back of my book. I've put glue on the bottom and the sides of both so that we have 2 more pockets that open of the top.

I've stamped one of the picket fence "Coffee Understands" stamps on the first page and made a tuck spot with one of the die cuts on the second page. On the third page I've used the coffee stain from the "Coffee Understands" stamp and the rest of that die cut to make another tuck spot and on the fourth page I've added one of the cappuccino cup stickers.

Next I've chosen 3 of the die cuts from the ephemera pack and a tag from the sticker sheet which I've stuck onto cardstock. I've stuck the memories tab on the back of the journaling card so just the memories part peeps out and I've cut the cardstock around the sticker leaving a very tiny border. These will go into the 3 pockets we created.

Here's the finished book with the tags in. I also added a bit of lace trim to the front cover on top.

And here's the folder with everything inside :) I added one of those cute little blackboards as well.

Here's the Video of everything I have made.
I hope you enjoyed making this folder with me and I'll see you again with my last project for this month.
xx Gina- stay awesome
Love all of this wow..
ReplyDelete